Push Security
Integrate Query with Push Security to surface details on accounts, apps, browsers, detections, employees, and findings.
TL;DRTo integrate Push Security with the Query Security Data Mesh:
- Generate a Read-only API key in the Push Security console.
- Configure a Push Security Connector.
- Use Query Search to parallelize searches and surface details about accounts, apps, browsers, detections, employees, and findings for incident response (IR), threat hunting, investigations, and other security and observability use cases.
Overview
Push Security is a browser-based Identity Threat Detection & Response (ITDR) tool that integrates with popular browsers across any device and your Identity Provider (IdP) of choice such as Google Workspace or Okta. From there, Push Security analyzes all of the applications that users access, applies policies and determines best-practice configurations, as well as detects novel browser-based tradecraft and moves to stop it automatically. Push Security also offers a simple REST API that allows you to view all of these data points in a centralized location, or, federated via Query Federated Search powered by the Query Security Data Mesh.
All federated searches have their searches and results expressed in the terms of the Query Data Model (QDM), which is based on the Open Cybersecurity Schema Framework (OCSF). Each API source is normalized into a specific QDM/OCSF Event Class to standardize and normalize the data for increased situational awareness, ease of aggregation of filtering, and easy pivoting. The following table provides information about the normalization from Push Security API into an OCSF/QDM event, and which Entities are supported for quick searches.
| API Name | QDM/OCSF Event Class | Entities/Observables |
|---|---|---|
| List Accounts | User Inventory Info | Account ID (id)Email Address ( email)User UID ( employeeId, passwordId) |
| List Apps | Application Lifecycle | Resource Name (friendlyName)Resource UID ( id)User UID ( ownerId) |
| List Browsers | Device Inventory Info | Email Address (email)Resource UID ( id)User UID ( employeeId) |
| List Detections | Detection Finding | Email Address (employee.email)Resource UID ( browserId)User UID ( employee.id, employeeId) |
| List Employees | User Query | Email Address (email)Group Name ( groups)User UID ( id) |
| List Findings | Compliance Finding | Account ID (accountId)User UID ( employeeId, passwordId) |
Query Federated Search allows you to parallelize search across common metadata within the Push Security data model. For instance, the Employees are generated from IdP connections while the Accounts are derived from actual SSO (SAML, OAuth2) app grants, searching on an email address will provide all of the associate records plus information on the device/browser used and any applicable Findings or Detections impacting the user. Zooming out, when used in concert with other Query Federated Search Connectors you can get raw logs from the IdP such as Entra ID sign-in and audit logs or Google Workspace activity logs, as well as MDM or EDR data by the same data points.
Some details on searchesQuery provides filter emulation for searches that are not natively supported by Push Security, this may lead to some delays if you use multi-condition complex searches in the Query UI, the Query Splunk App, or the FSQL REST API.
Prerequisites
To connect a Push Security Connector with Query Federated Search you'll need to
- From the Push Security console, navigate to the Settings page and select API Keys.
- When generating an API key, select
Read onlyscopes, Query Federated Search does not require write/update permissions. - Save the content of the API key somewhere secure, you will need it for configuring the Connector in the next section.
To learn how to configure a Push Security Connector, proceed to the next section.
On NHI securityNHI - or, Non-Human Identities - such as your Push Security API keys are extremely sensitive, even with just read-only permissions. Query securely stores the Client Secret in a dedicated AWS Secrets Manager Secret per Connector per Tenant.
Every copy of your API key is stored as securely as each other with minimum necessary permissions that only allows the specific piece of serverless infrastructure to retrieve the secret, it is never cached or persisted outside of the Secret.
Setting up the Push Security Connector
Use the following steps to create a new Query Federated Search Connector for Push Security.
-
Navigate to the Connectors page, select Add Connector, and selectPush Security from the
Identity & HRcategory as shown below (FIG. 1). You can also search for Push Security using the search bar in the Add Connector page.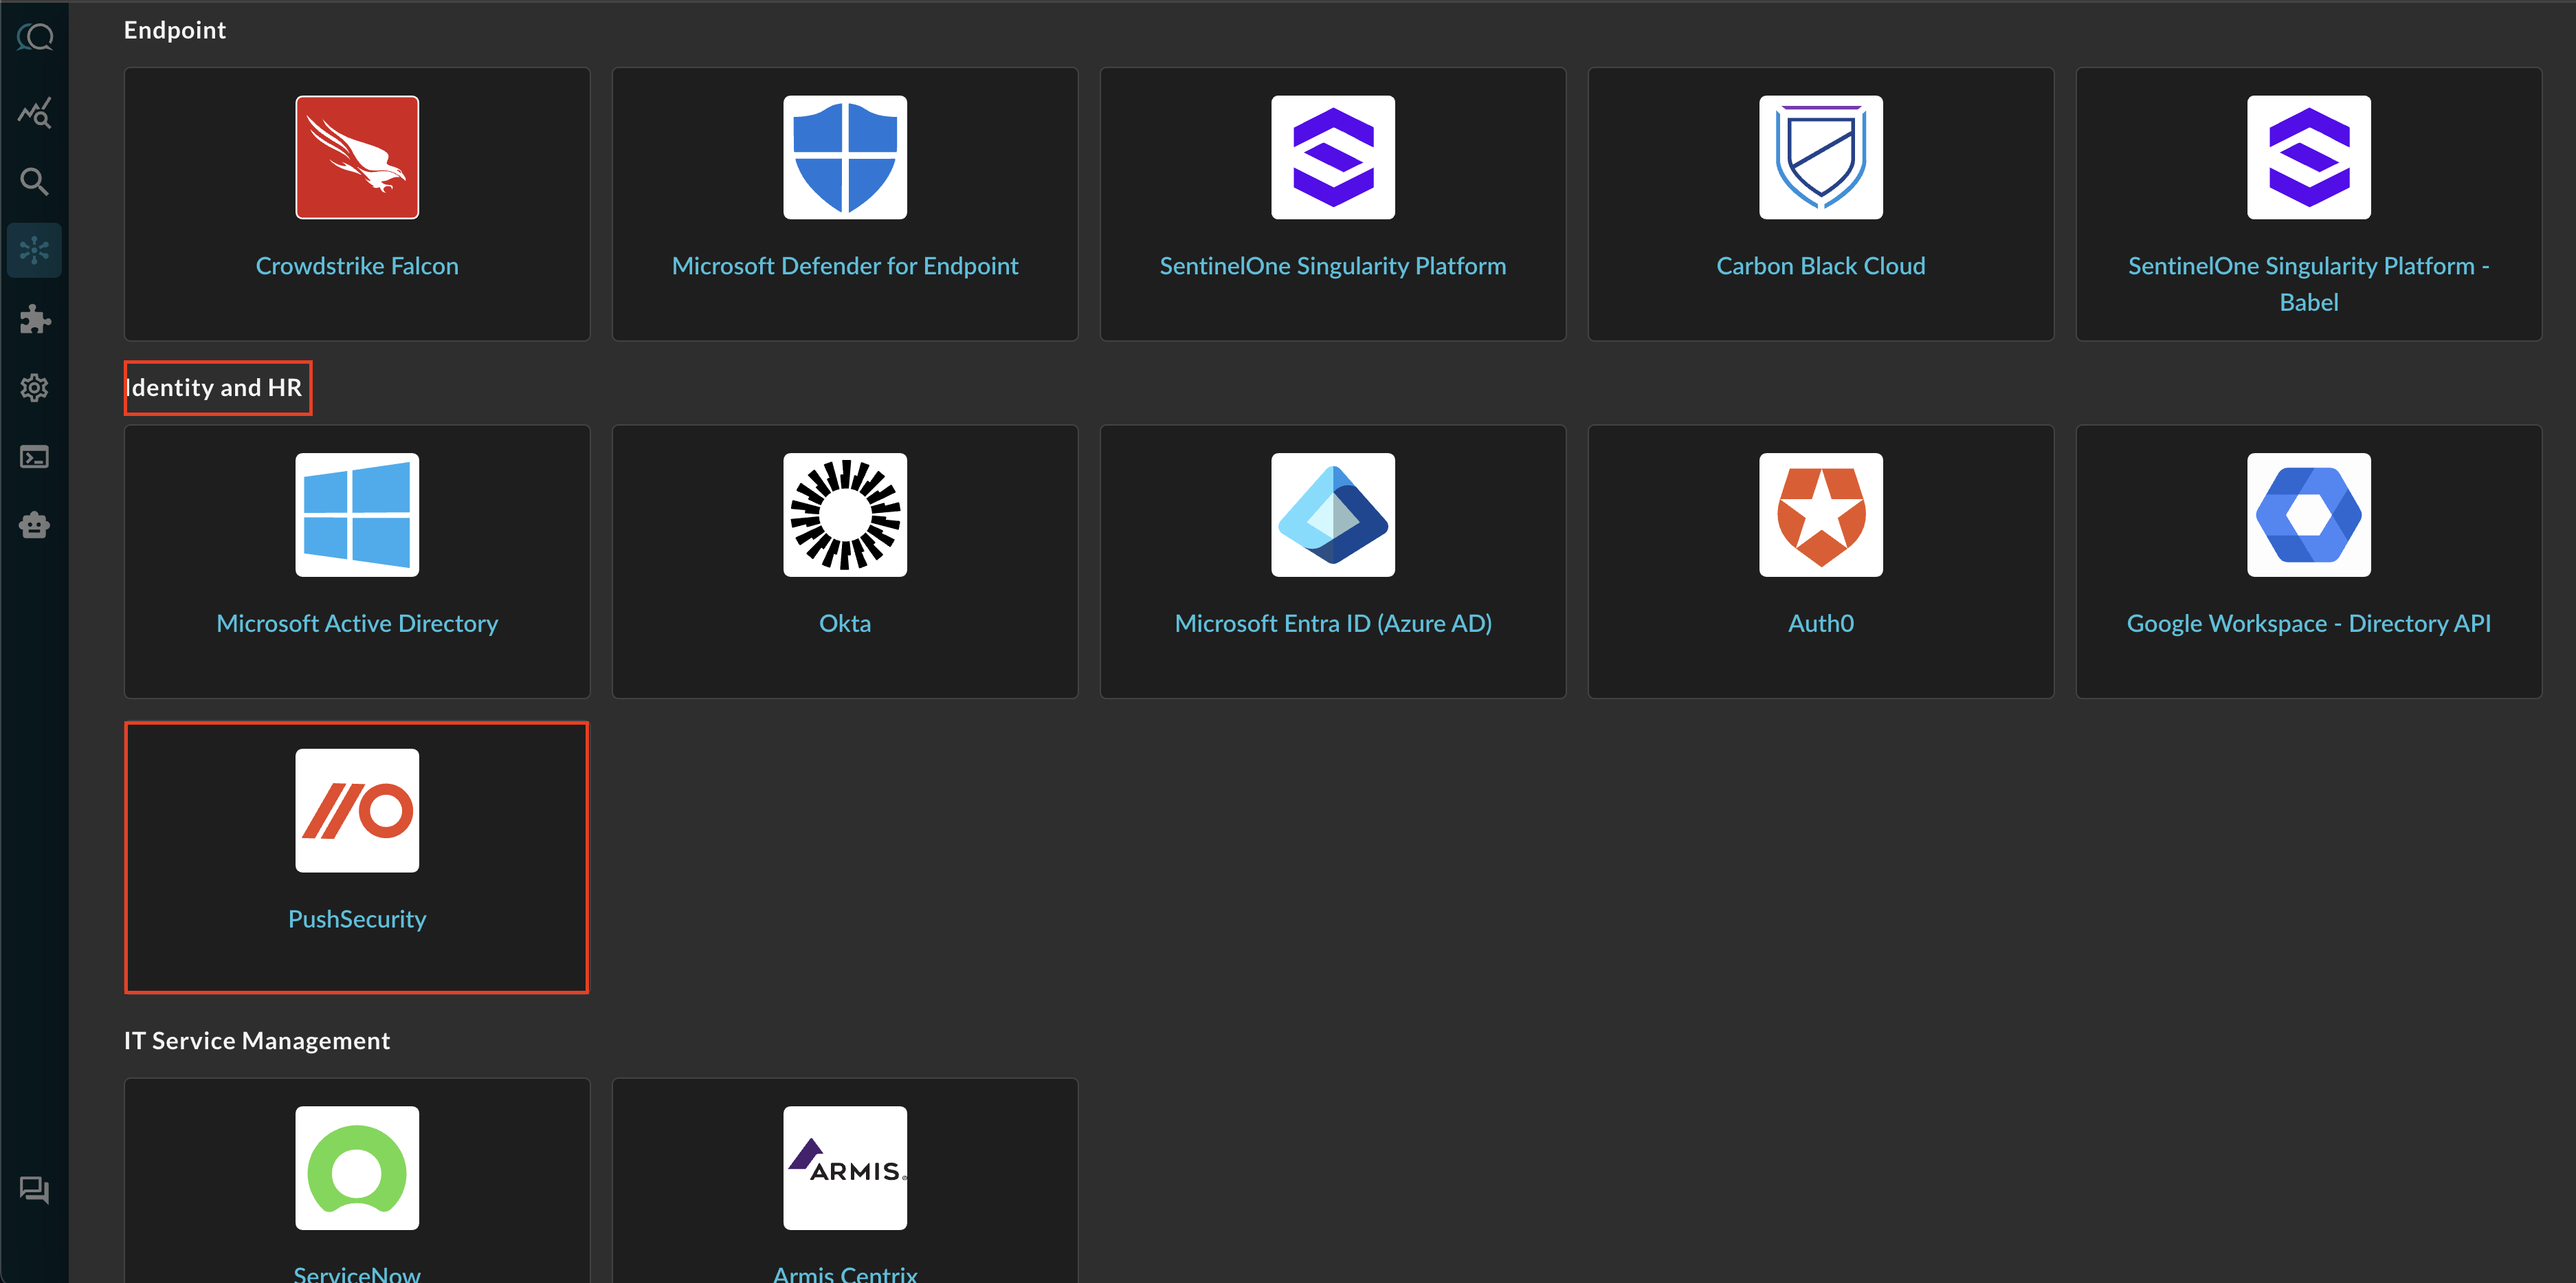
FIG. 1 - Locating the Push Security Connector
-
In the Configure Connector tab, add the following detail as shown below (FIG. 2):
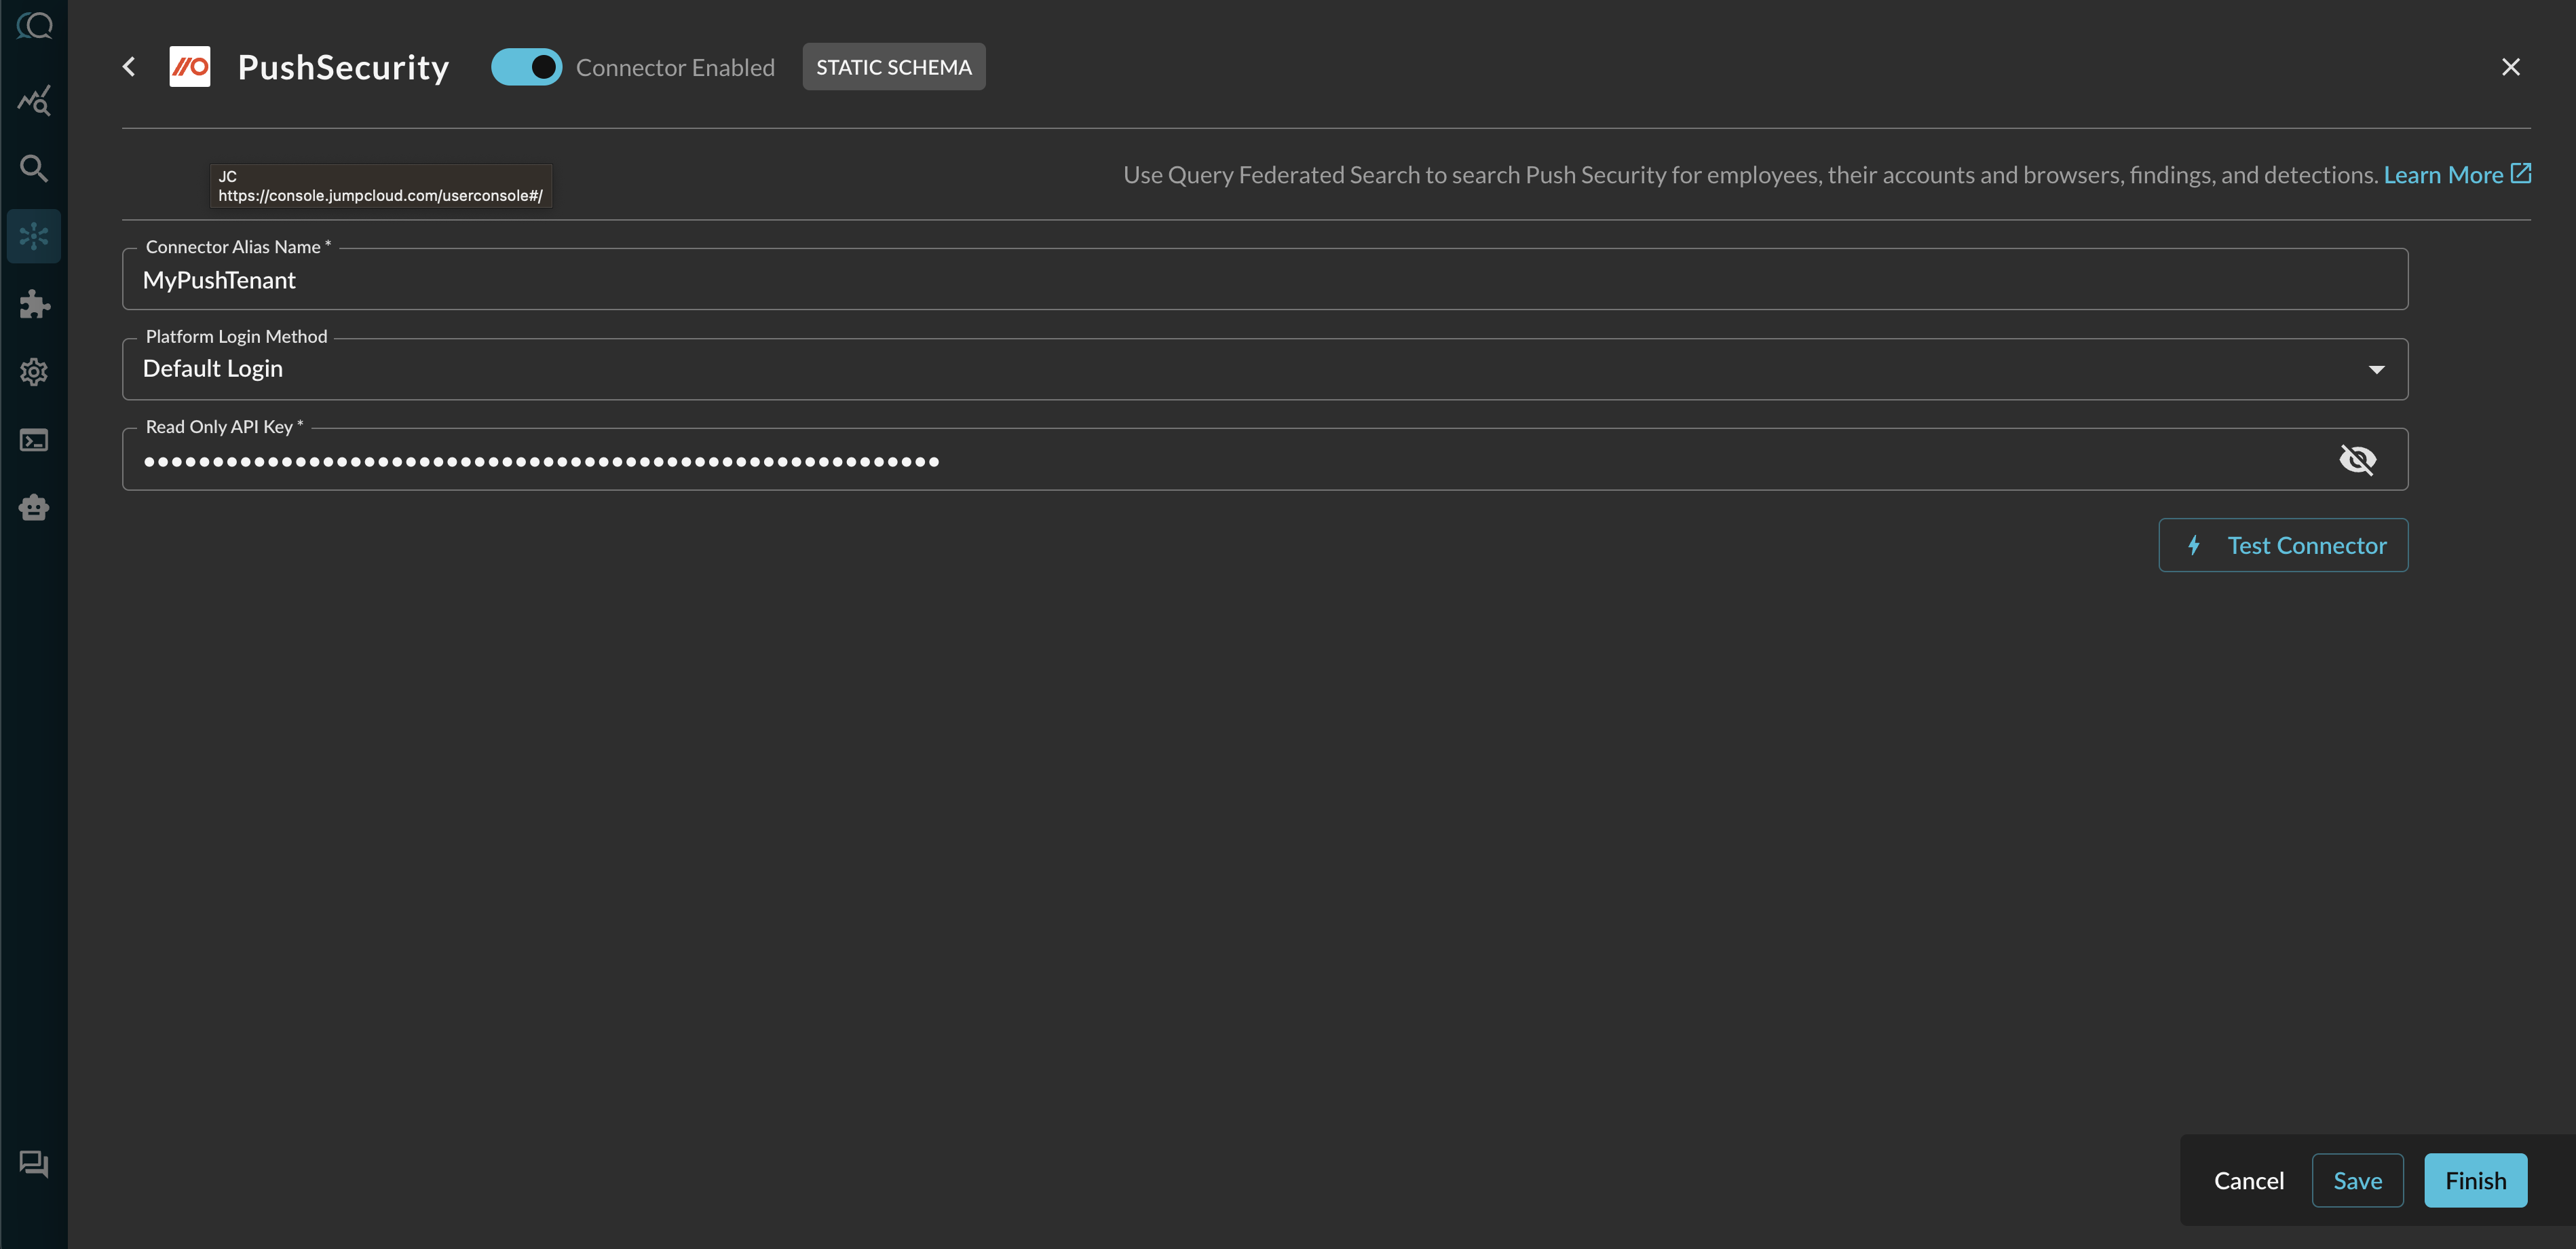
FIG. 2 - Configuring the Push Security connector
- Connector Alias Name: The human-readable name you want to give to this connector, you can provide the name of your tenant or designate multiple different Push Security deployments if you are part of a multi-division company or a MSSP.
- Default Login: Leave the default value:
Default Login. - Read Only API Key: Your
read-onlyscoped API key, copied in Step 3 of the Prerequisites section.
-
Select Save to save and activate the Connector.
-
Select Test Connection from the bottom-right of the connection pane to ensure that your key is valid and that we can connect to all API endpoints for this integration.
You will now see Push Security added as an available Connector within the Query Search and Query Summary Insights UI.
Querying Push Security Connectors
Within the Query Search UI, all Connectors are enabled by default. To check that your specified Connector(s) for INTEGRATION are enabled, navigate to the Identity & HR section of the Selected Connectors dropdown and ensure that your specified Push Security Connector(s) are are selected (denoted by a checkbox) before running your searches as shown below (FIG. 3).
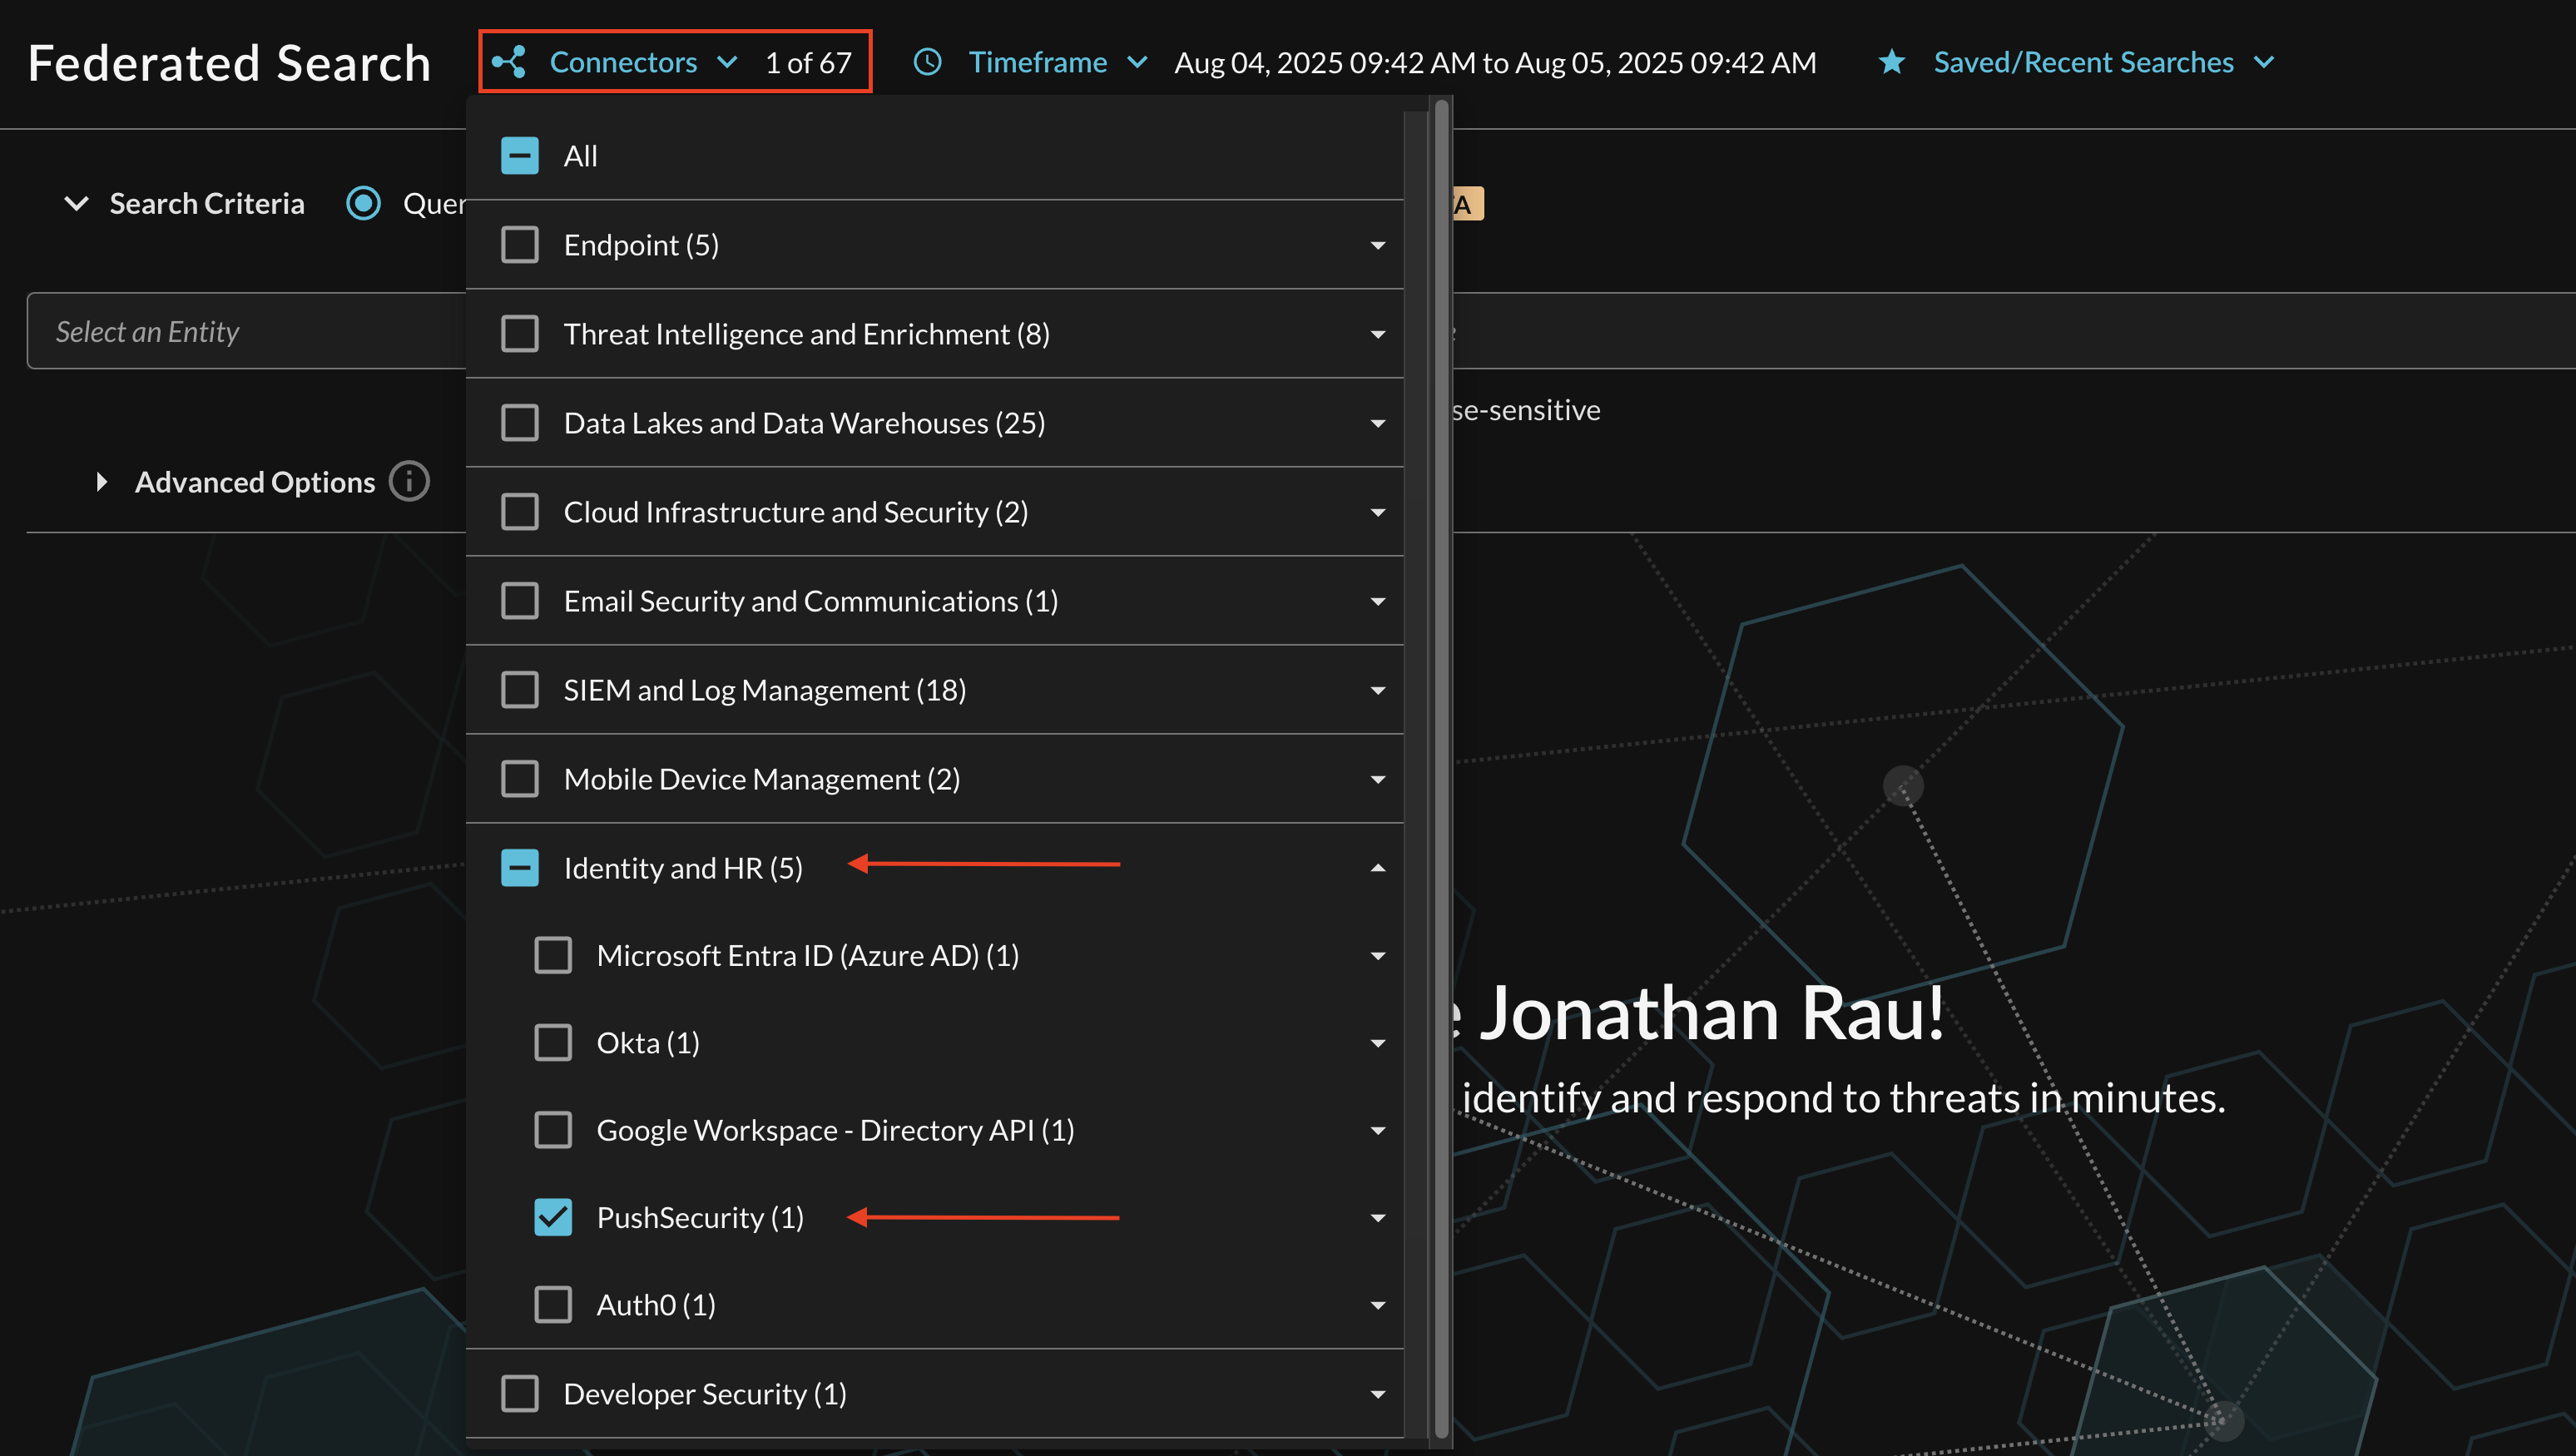
FIG. 3 - Selecting the Push Security Connector(s) for search
Resources
Troubleshooting Steps
- Ensure that your API Key is still valid, regenerate and update the Connector as needed.
- Ensure that you have API access in your Push Security tenant.
If you have exhausted the above Troubleshooting list, please contact your designated Query Sales Engineer or Customer Success Manager. If you are using a free tenant, please contact Query Customer Success via the Support email in the Help section, or via Intercom within your tenant.
Updated 8 months ago