Microsoft Intune
Integrate Query Federated Security with Microsoft Intune MDM to retrieve Managed Device & Audit Event information.
TL;DRTo integrate Microsoft Intune with Query:
- Create an App Registration with necessary Scopes and Admin Consent.
- Generate a Client Secret from the App Registration, and retrieve your Client ID and Tenant ID.
- Configure a Query Federated Security Connector for Microsoft Intune.
- Use Query Federated Security to surface details and metadata on Managed Instances and Audit Events from Intune for use in Incident Response, Triage, Investigations, Threat Hunting, Red Teaming, Auditing, and more.
Overview
Microsoft Intune is a cloud-based endpoint management service that helps organizations manage and protect their devices, apps, and data. It's part of the Microsoft 365 suite and allows for both corporate and BYOD device management, ensuring data security and user productivity. Intune is managed through a web-based portal and offers features like device configuration, application deployment, and compliance policies. It is available as part of standalone Intune Plan 2 licenses or bundled with other M365 SKUs such as M365 E3 or M365 E5. Intune is also known as MEM or as a MDM tool. For Security Operations, Intune is an important source of asset context and metadata, providing deeper information than what may be available from Microsoft Defender for Endpoint (MDE) or even the Devices listed in Entra ID.
All federated searches have their searches and results expressed in the terms of the Query Data Model (QDM), which is based on the Open Cybersecurity Schema Framework (OCSF). Each API source is normalized into a specific QDM/OCSF Event Class to standardize and normalize the data for increased situational awareness, ease of aggregation of filtering, and easy pivoting.
| API Name | QDM/OCSF Event Class | Entities/Observables |
|---|---|---|
| Managed Devices | Device Inventory Info | Resource Name (managedDeviceName)Resource UID ( id, azureADDeviceID, imei, meid, iccid, udid, easDeviceId)MAC Address ( wifiMacAddress, ethernetMacAddress)Hostname ( deviceName)Serial Number ( serialNumber)User Name ( userPrincipalName)User UID ( userId)Email Address ( emailAddress) |
| Audit Events | Web Resources Activity | Resource Name (actor.applicationDisplayName)Resource UID ( actor.applicationId, resources.resourceId)Email Address ( actor.UserPrincipalName)User Name ( actor.ServicePrincipalName)User UID ( actor.userId)IP Address ( actor.ipAddress) |
Query Federated Security provides full integration into the APIs listed in the table above and provides just-in-time normalization to OCSF, full query translation, pagination, and records streaming allowing you to query across important information for use in triage, audits, investigations, hunts, or otherwise. In the cases where filters are unavailable for direct querying via the API, Query Federated Security provides emulation of filters by over-fetching a larger sample of data and applying filters post-hoc. Using the Microsoft Intune Connector, users can automatically retrieve Intune metadata from Managed Devices when investigating alerts from MDE, Carbon Black Cloud, or CrowdStrike. For instance, searching on an implicated host by its Resource Name or Hostname will automatically pull that record from the Intune Managed Devices API. Likewise, investigating suspicious identity findings from Microsoft Defender for Cloud or Okta can also pull downstream Audit Events such as searching for an Application ID synced with your SSO/IDP or looking at a user's IP Address.
Prerequisites
To use all capabilities of this Connector, you must have either a Microsoft Intune Plan 1 or Plan 2license. These are made available via a variety of plan tiers such as M365 A/E/F/G5 and F3, and others.
| API Endpoint | App Permission Required | Minimum Plan Required |
|---|---|---|
| Managed Devices | DeviceManagementApps.Read.All | Microsoft Intune Plan 1 |
| Audit Events | DeviceManagementApps.Read.All | Microsoft Intune Plan 1 |
Ensure that the Administrator who creates the Application Registration for this Connector has the plan active. The permissions listed are also the minimum necessary to retrieve all data available to the Query Connector for Microsoft Entra ID.
To connect a Microsoft Intune with Query Federated Security you'll need to execute the following steps.
-
Login to your Microsoft Azure subscription where your Tenant is hosted and navigate to Microsoft Entra ID. On the left-hand navigation pane, select App registrations as shown below (FIG. 1).
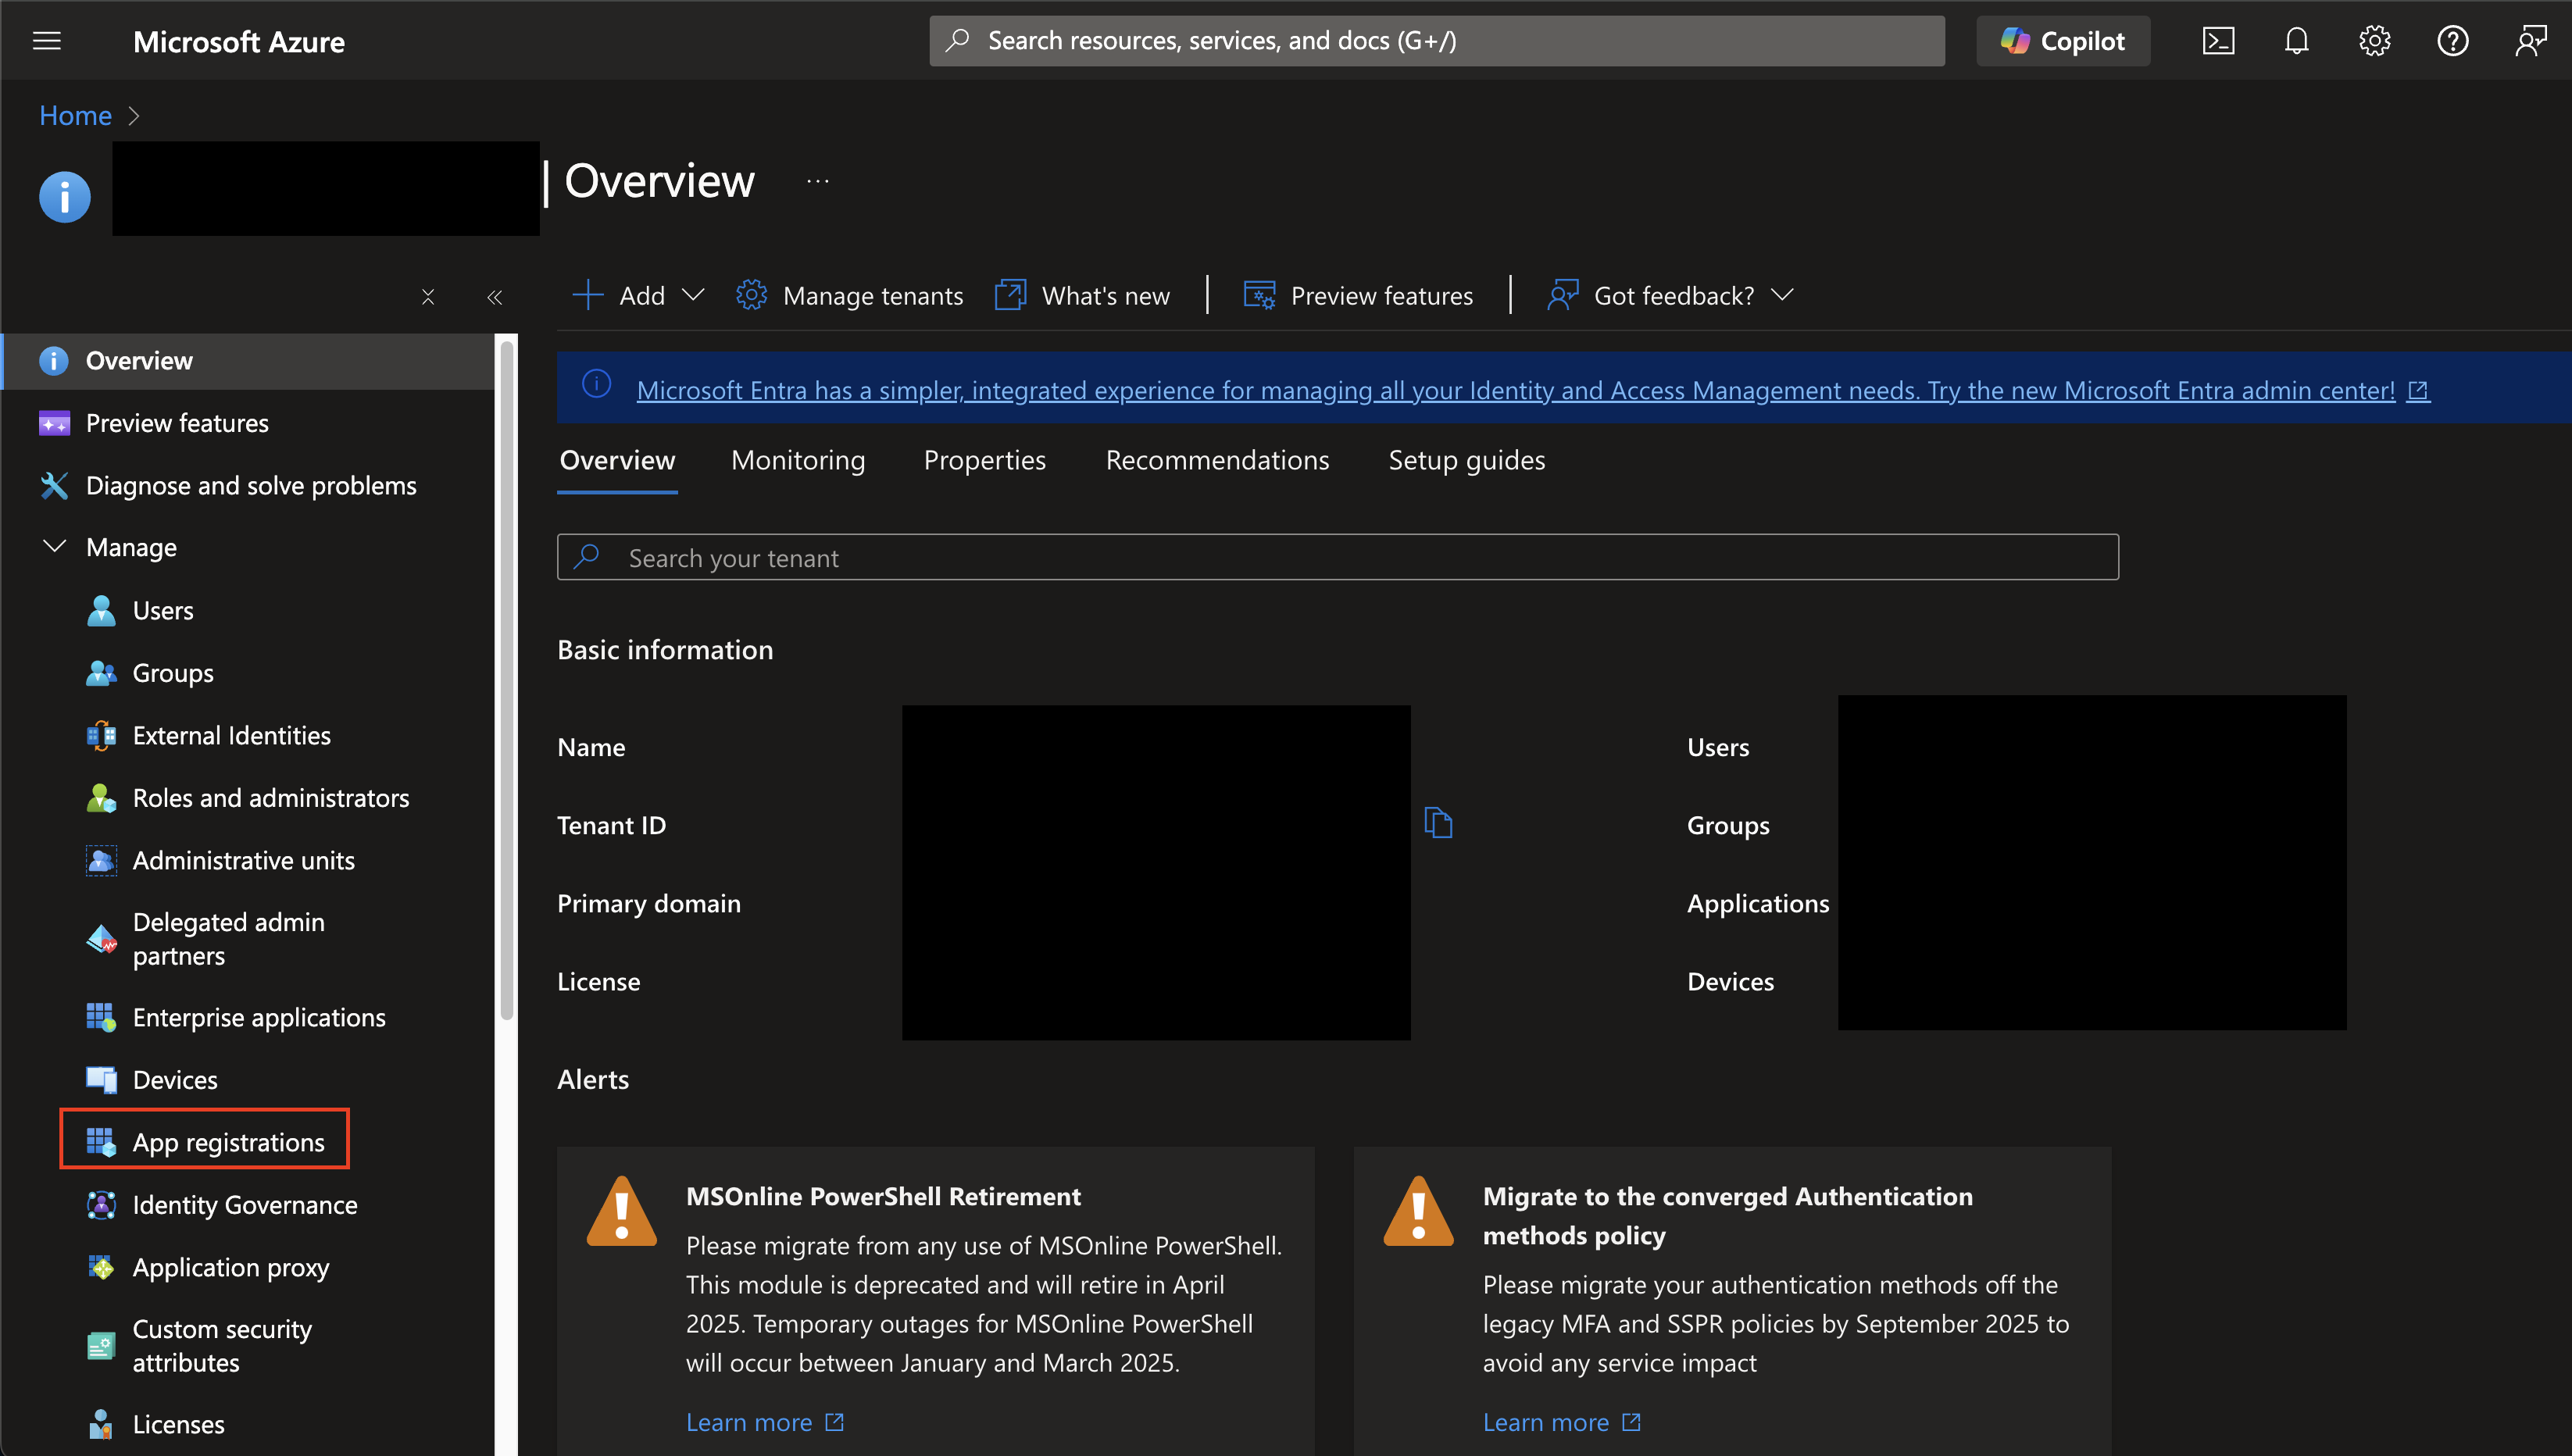
FIG. 1 - Navigating to App registrations in Entra ID
-
At the navigation tab on the top of the page select + New registration. Enter a Name (such as
QueryFederatedSearchForMicrosoftIntune) and select the appropriate Supported account types for your tenancy and select Register at the bottom-left as shown below.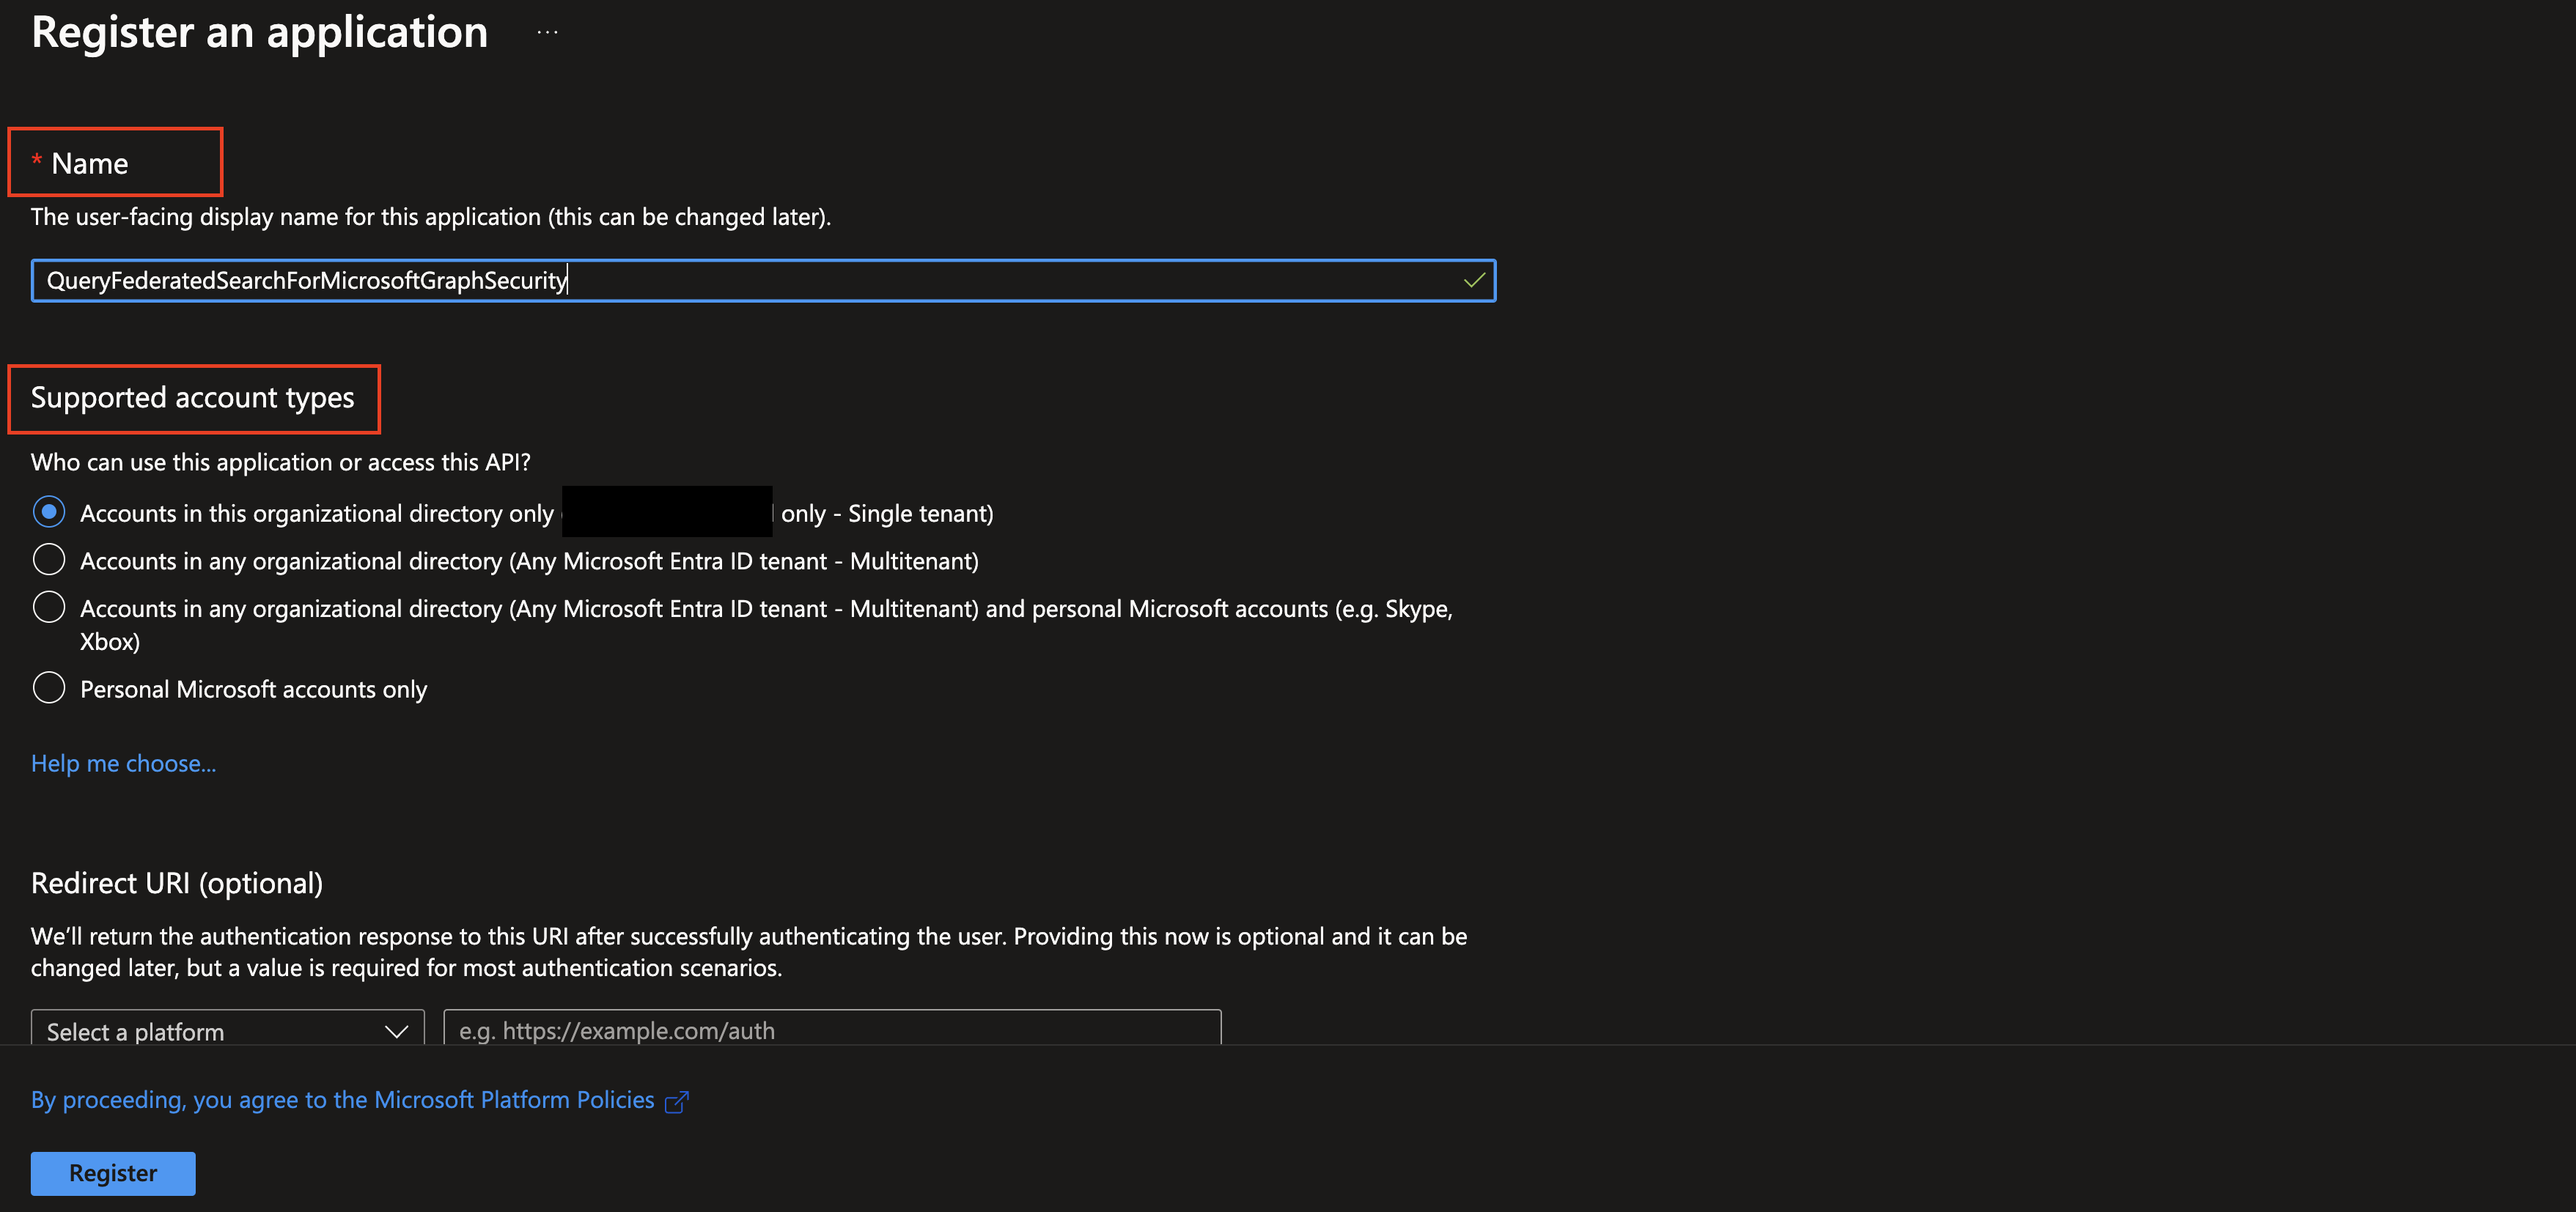
FIG. 2 - Naming and selecting the supported account types for an App registration
-
You will (should) be automatically redirected to the App registration's overview screen. Copy the value for Application (client) ID and Directory (tenant) ID as you will require them to create your Connector, as shown below (FIG. 3).
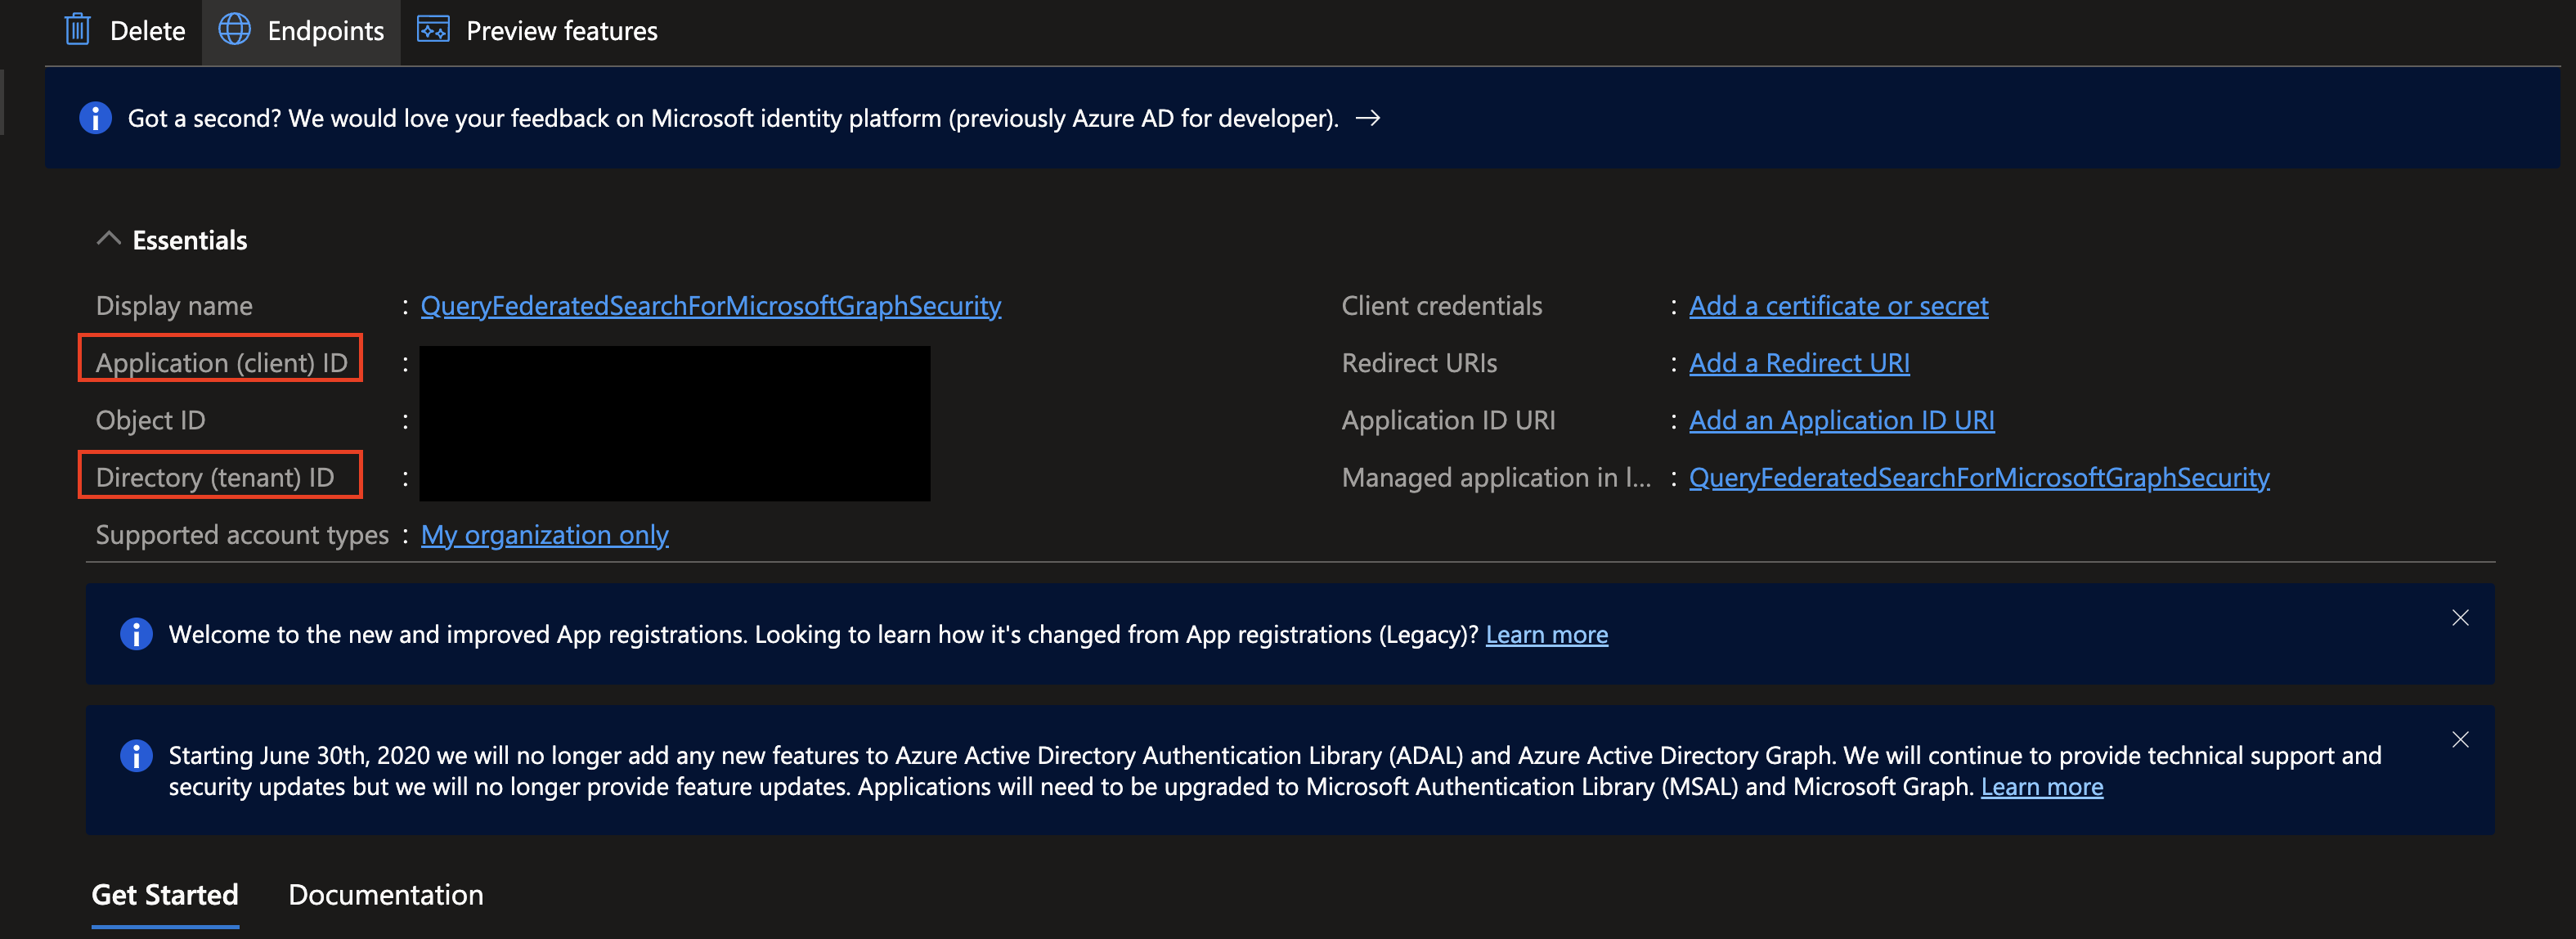
FIG. 3 - Copying the client ID and tenant ID from the App registration
-
In the left-hand navigation pane, select API permissions. Once at the API permissions screen, select + Add a permission under the
Configure permissionsheader at the center of the screen, as shown below (FIG. 4).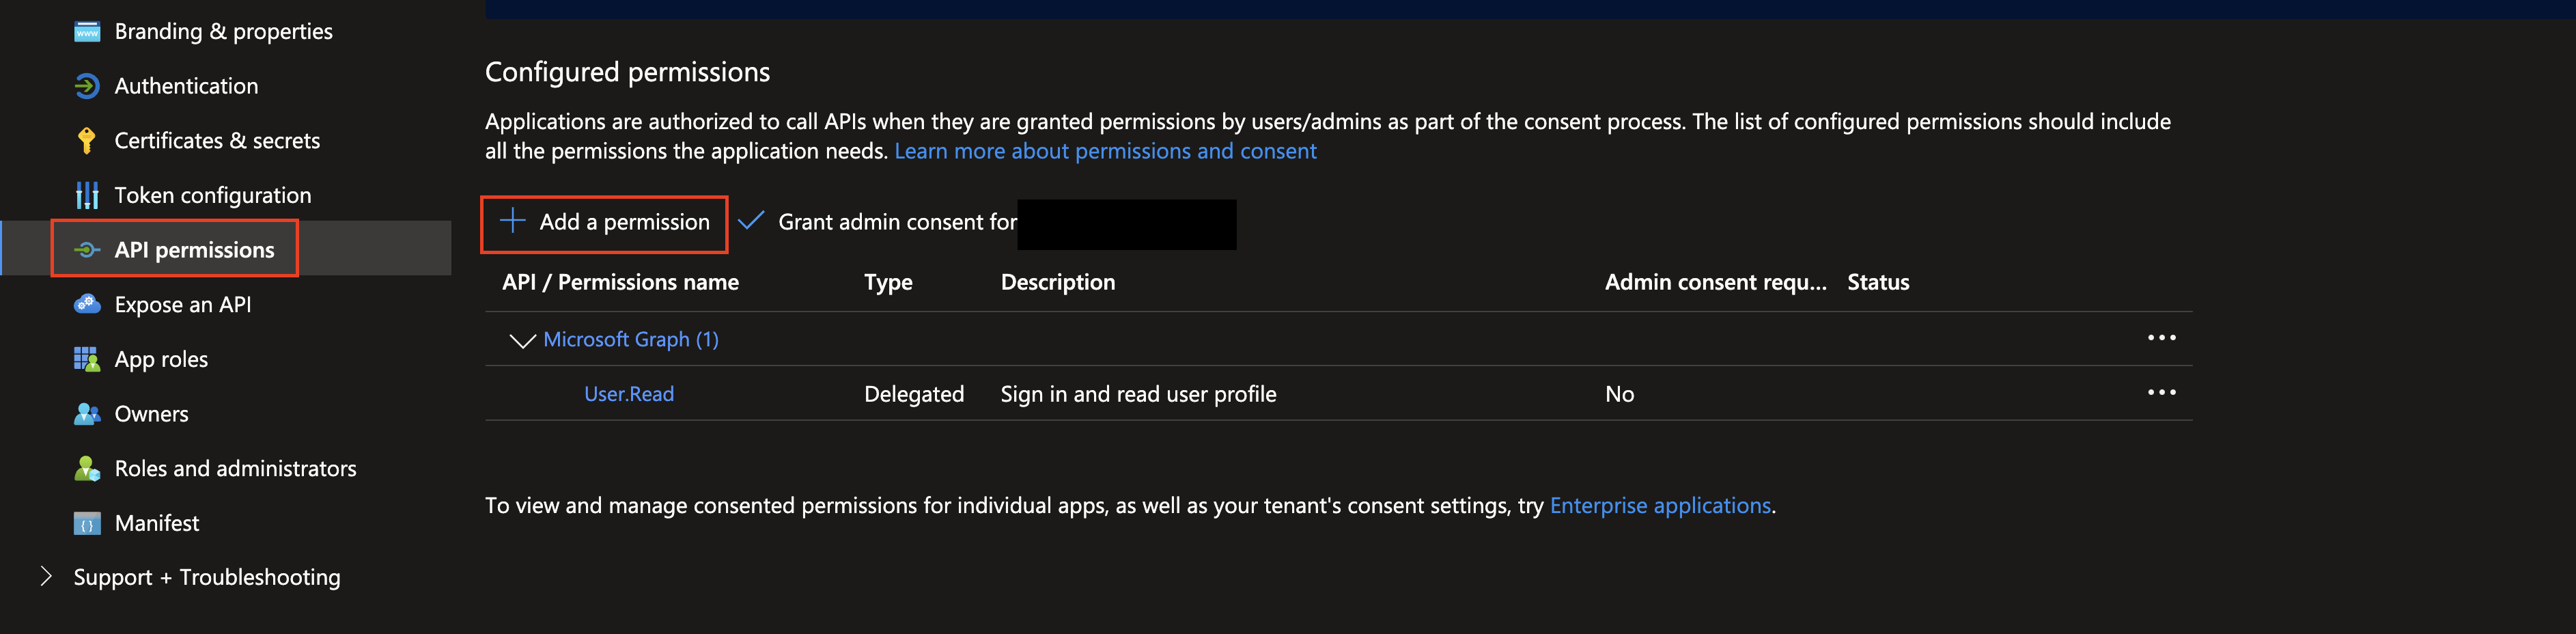
FIG. 4 - Adding permissions to an App registration
-
Select Microsoft Graph from the APIs, choose Application permissions, enter all of the required permissions in the table above, in search bar, toggle the checkbox next to the permission to select it, and select Add permissions at the bottom of the pane as shown below (FIG. 5). Ignore the screenshot showing
SecurityAlert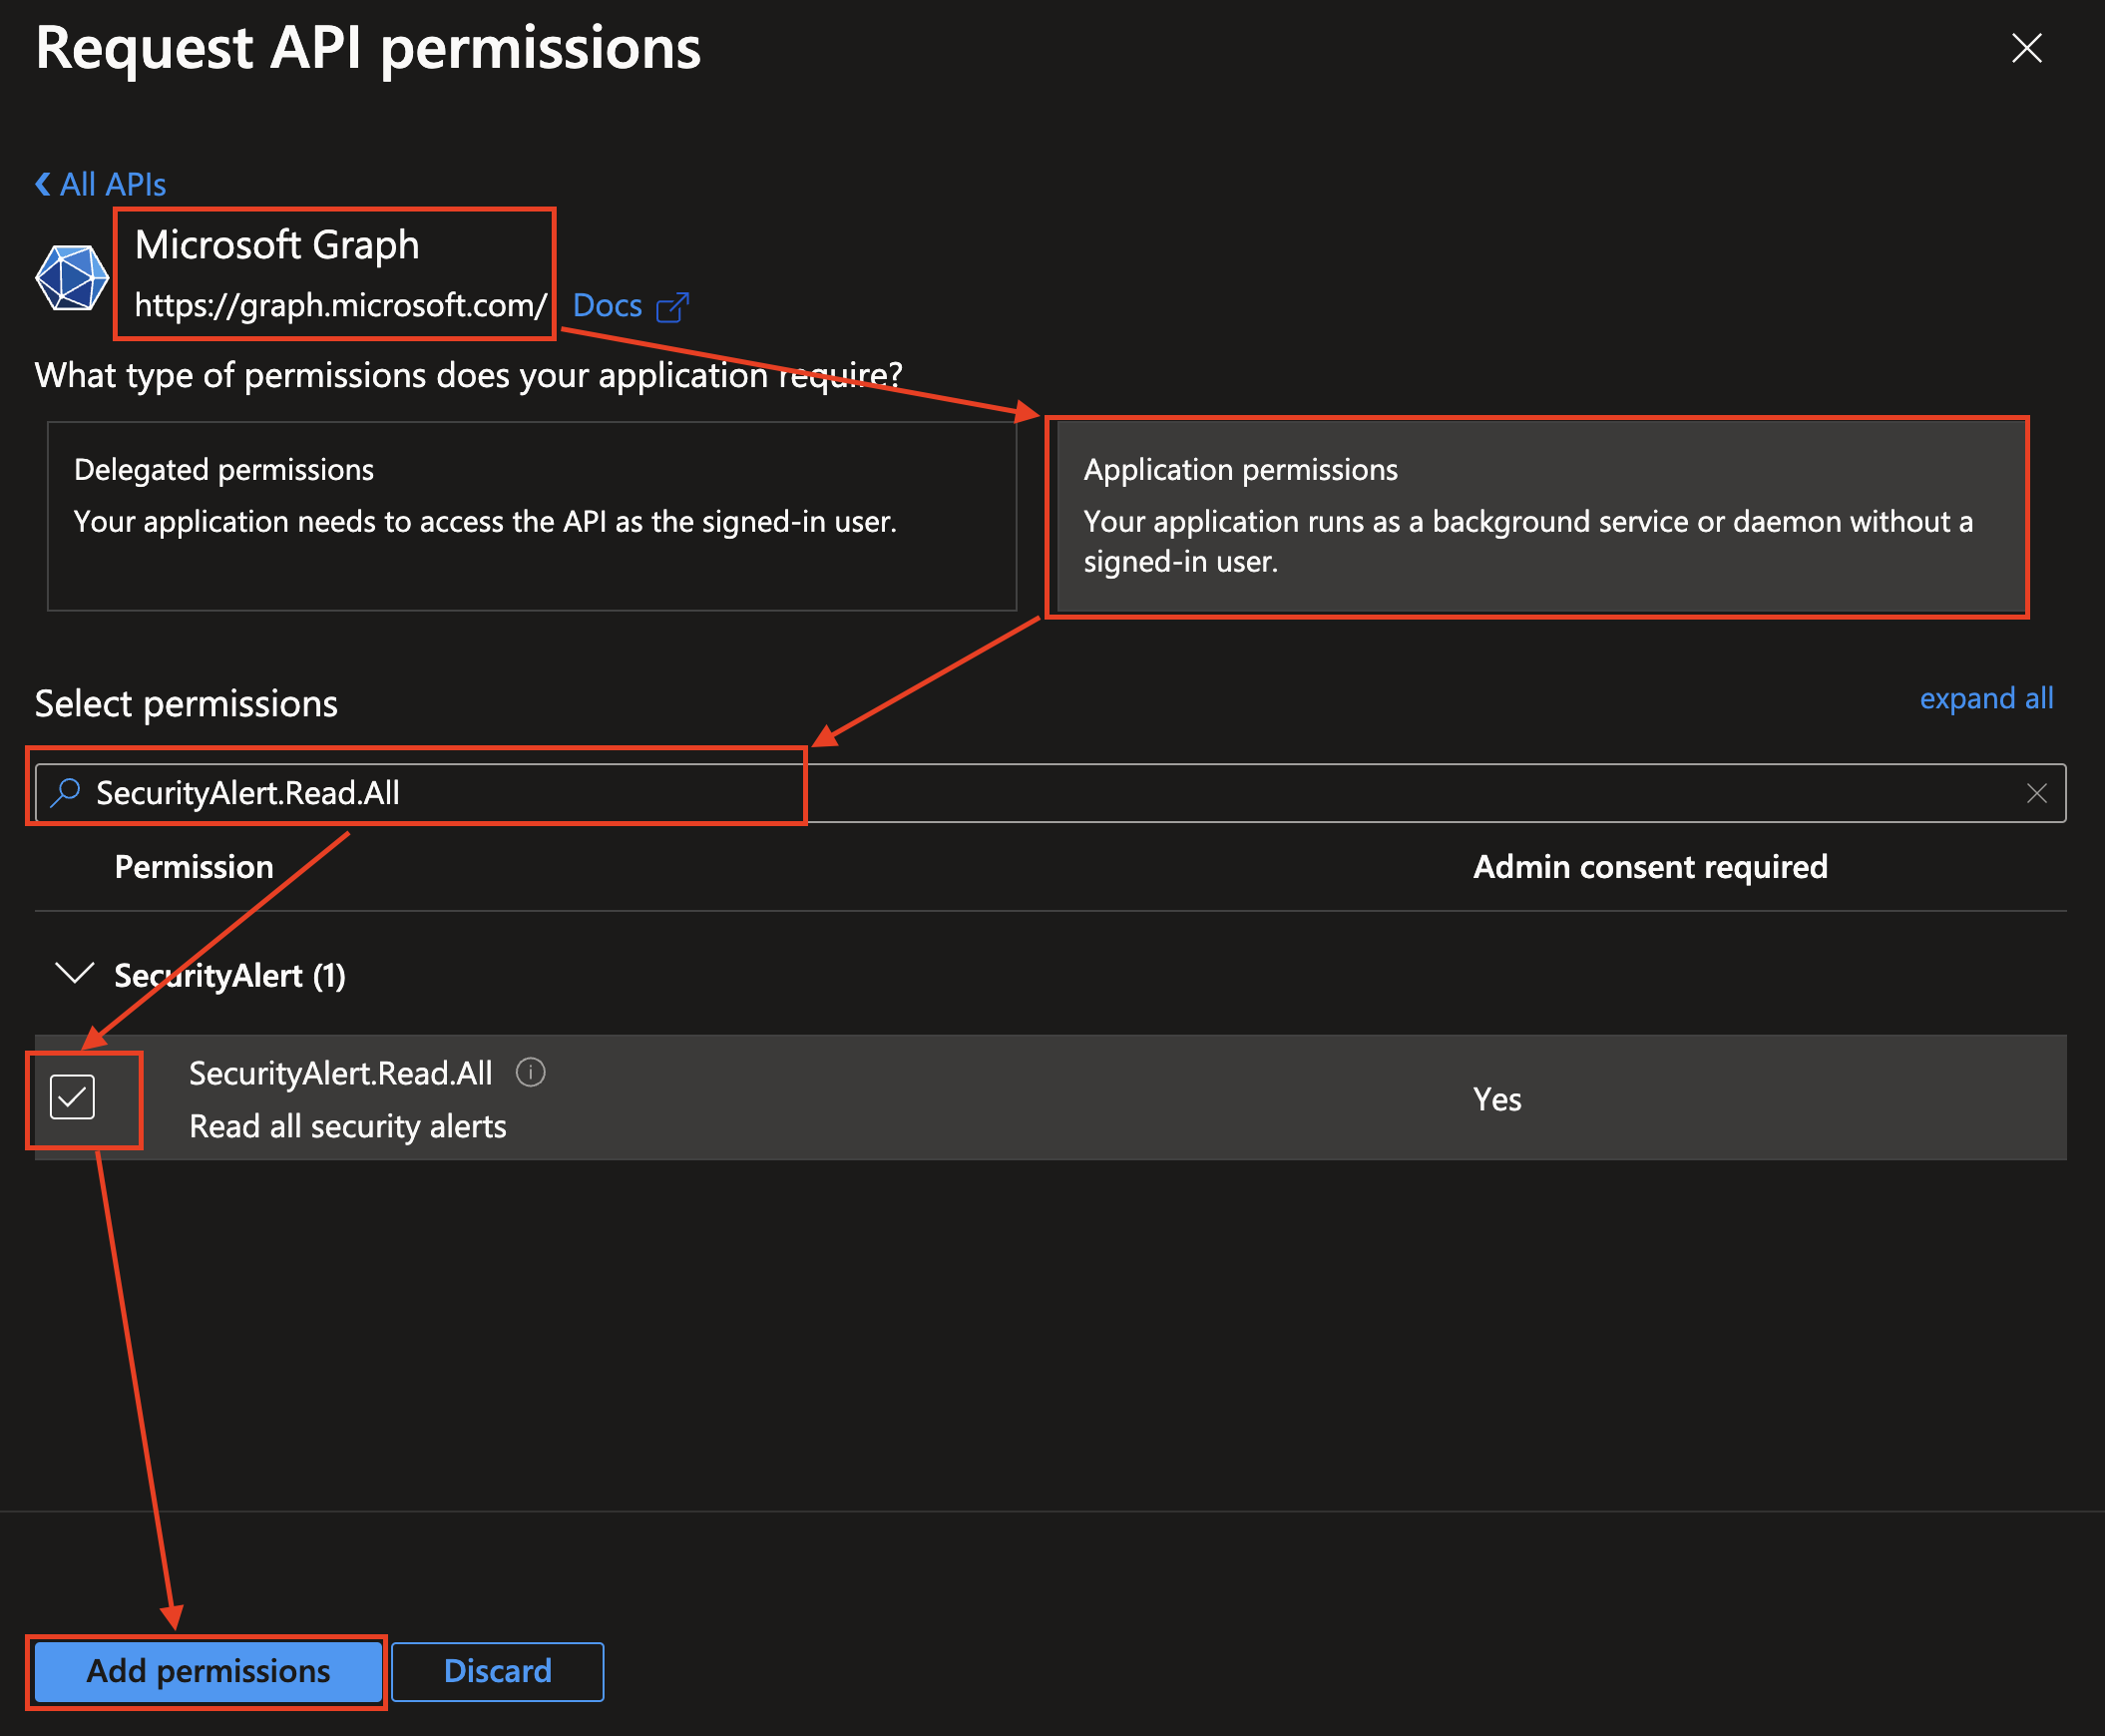
FIG. 5 - Adding the
SecurityAlert.Read.Allpermission to your App Registration -
Select Grant admin consent for {your_tenant_name} and from the
Grant admin consent confirmationpop-up select Yes as shown below (FIG. 6) to add domain-wide consent for your Application Permissions.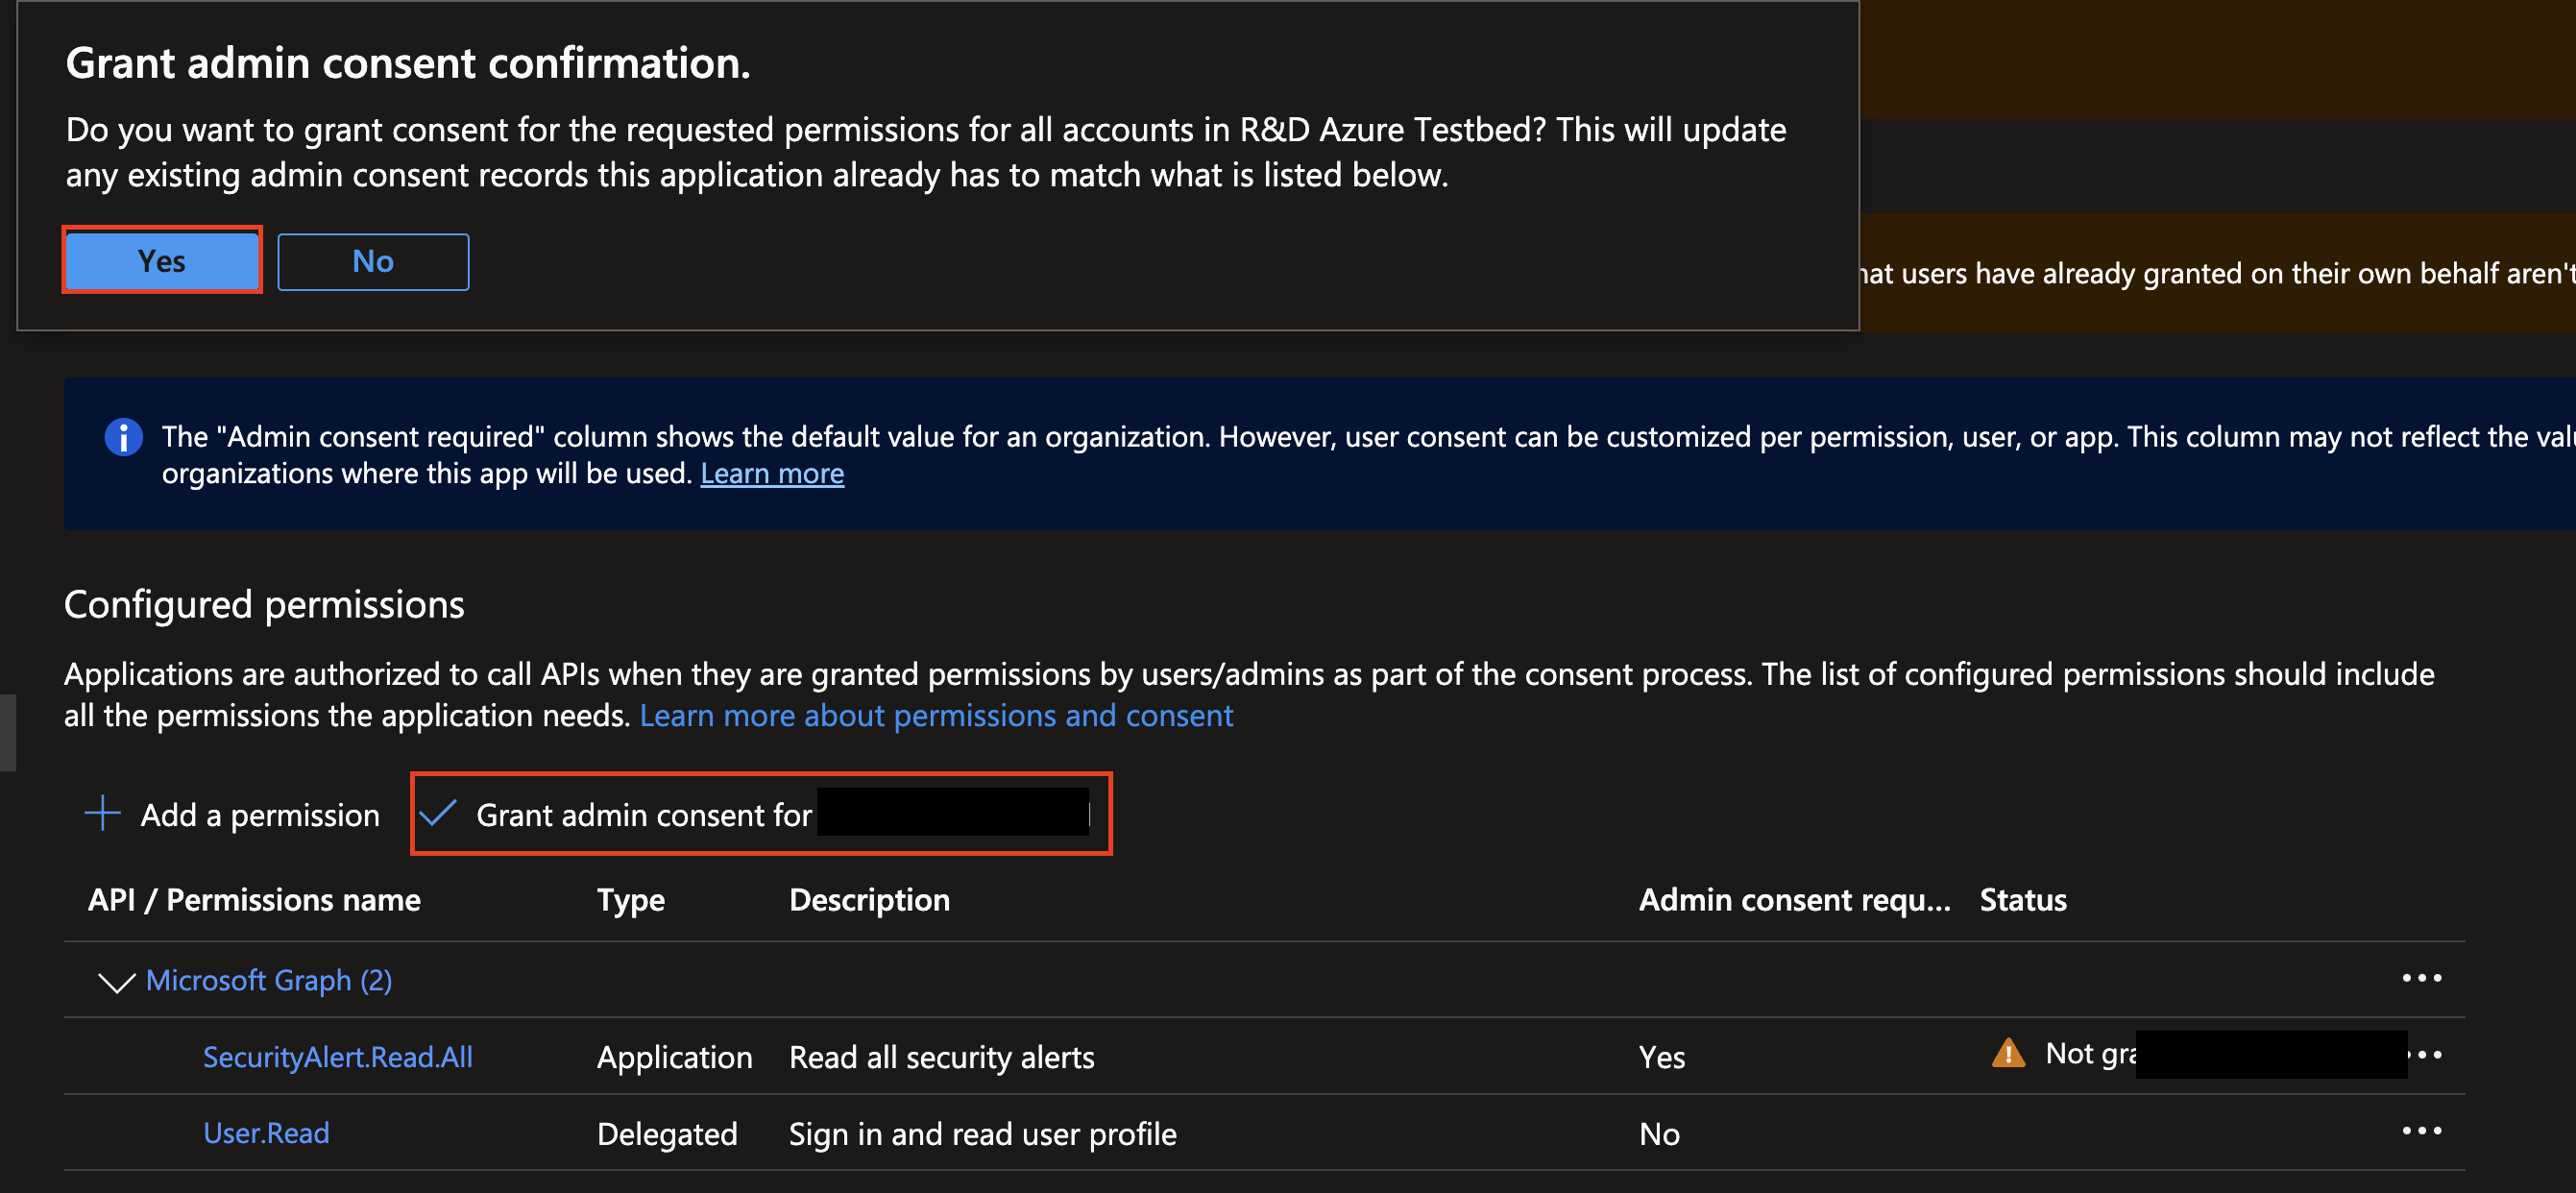
FIG. 6 - Granting admin consent for your App registration
-
In the left-hand navigation pane select Certificates & secrets, choose the Client secrets tab, and select + New client secret as shown below (FIG. 7).
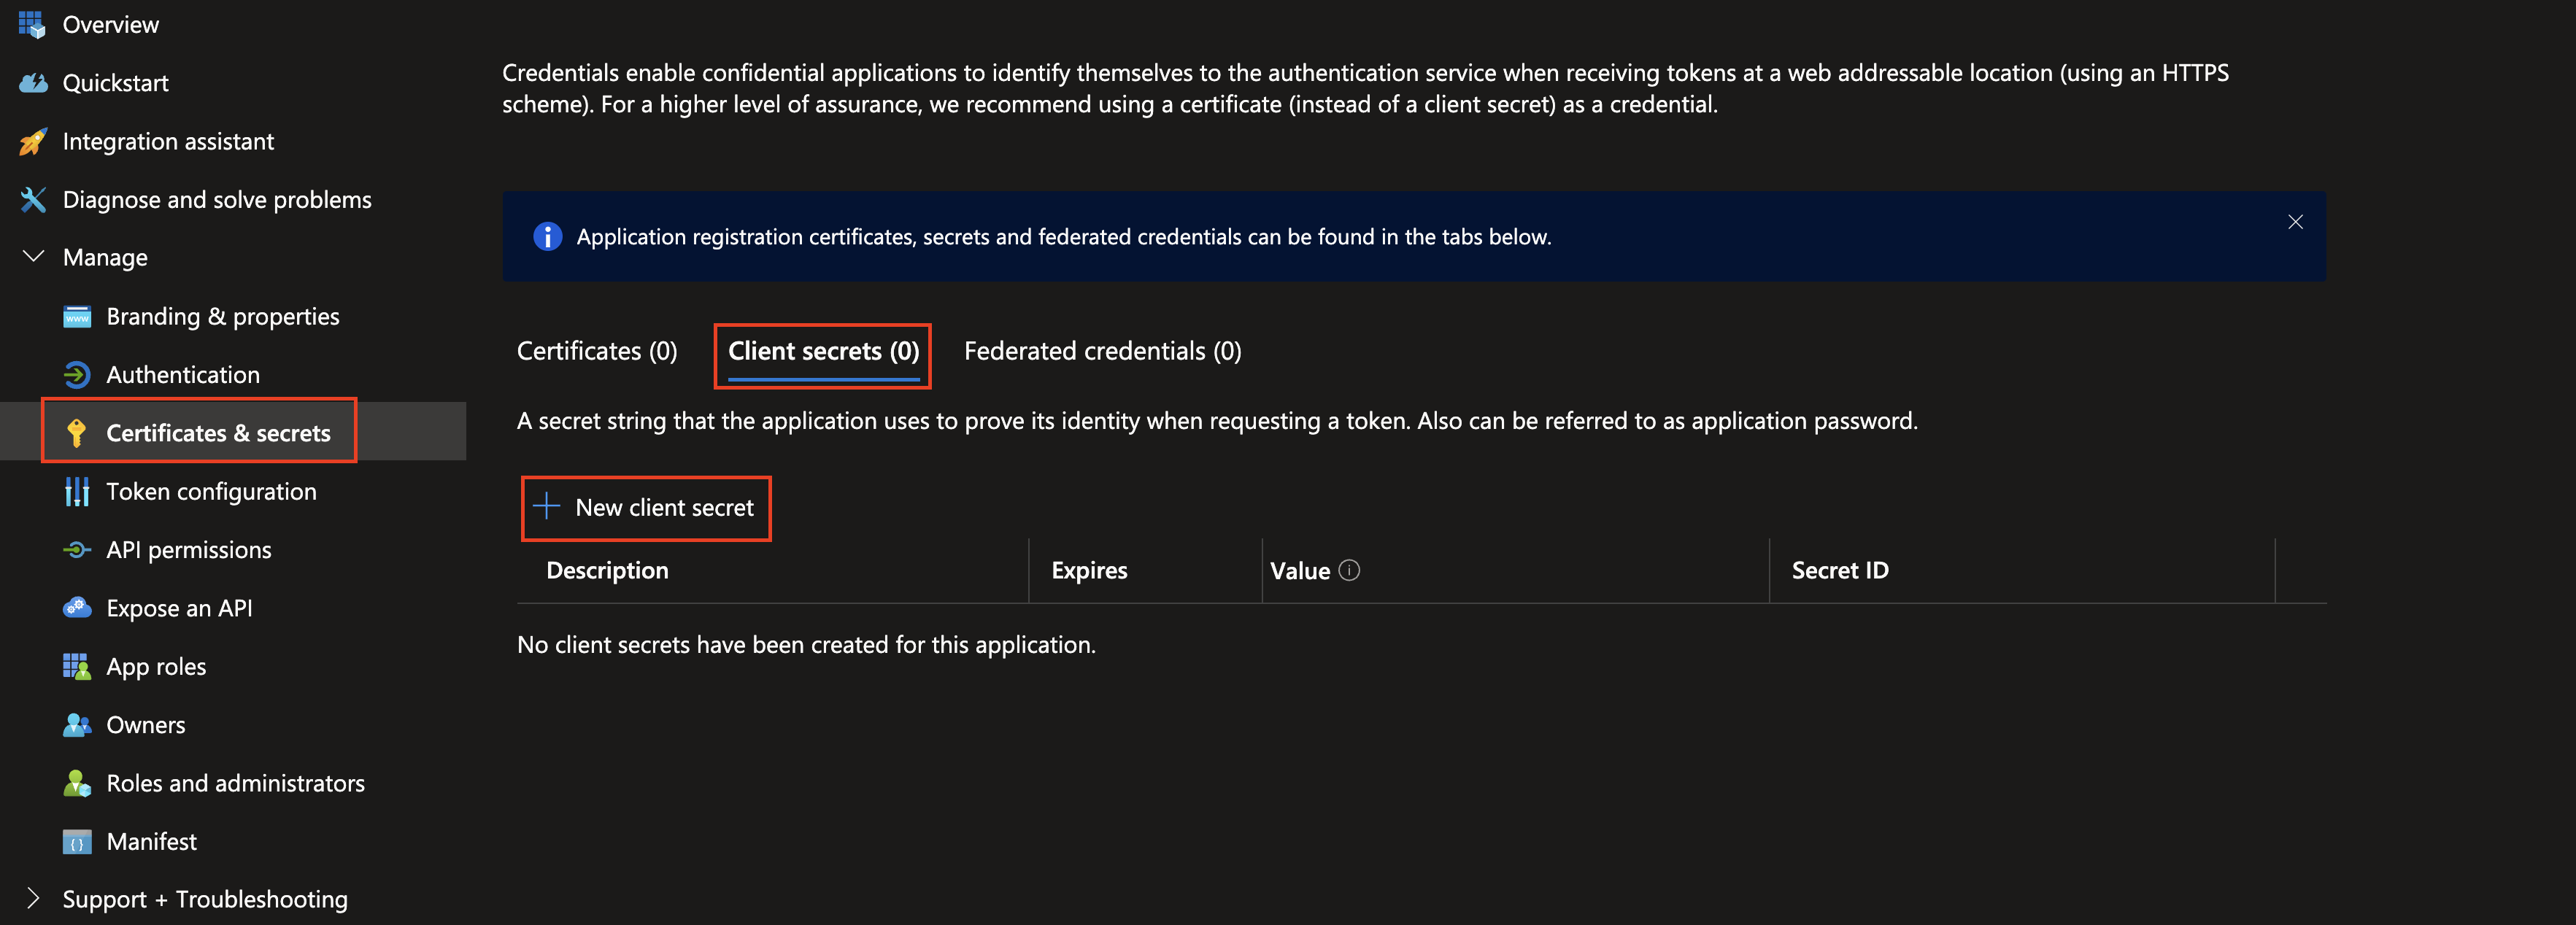
FIG. 7 - Creating a new client secret for your App registration
-
Provide a Description and select an appropriate Expires data (up to 2 year) and select Add from the
Add a client secretpane as shown below (FIG. 8).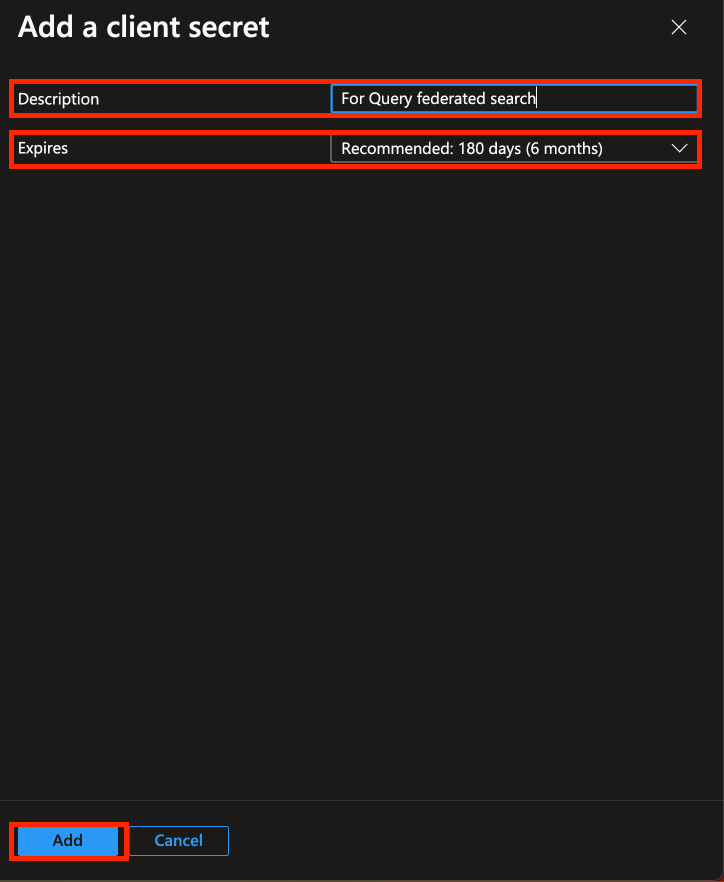
FIG. 8 - Adding a description and expiration date to your client secret
-
After creating your Secret, copy the value underneath the Value column, do not copy the value for Secret ID as shown below (FIG. 9). Immediately vault these credentials and save them for configuring your Connector in the next section.

FIG. 9 - Copy your SECRET VALUE and store it securely
To learn how to configure a Microsoft Intune Connector, proceed to the next section.
On NHI securityNHI - or, Non-Human Identities - such as your Enterprise Application (App Registration) client secrets are extremely sensitive. Query securely stores the Client Secret in a dedicated AWS Secrets Manager Secret per Connector per Tenant.
While this requires you to configure Connectors per Microsoft Intune Connector and continue to enter in your credentials, every copy is stored as securely as each other with minimum necessary permissions that only allows the specific piece of serverless infrastructure to retrieve the secret, it is never cached or persisted outside of the Secret.
Configure a Microsoft Intune Connector
- Navigate to the Connections page, select Add Connections, and select Microsoft Intune from the Identity and HR category, optionally type "Intune" in the search bar as shown below (FIG. 10)
- In the Connection Info section of the platform connector, provide the following details, select Save, and then Test Connection as shown below (FIG. 11).
-
Connection Alias Name: A contextual name for the Connector, this is used to disambiguate multiple of the same connector.
-
Microsoft Entra ID Tenant ID: The Tenant (Directory) Identifier of your Entra ID tenant.
-
Microsoft Entra ID Client ID: The Client (Application) Identifier of the Enterprise Application you created.
-
Microsoft Entra ID Client Secret: The Value of the Client Secret you generated for the Enterprise Application you created.
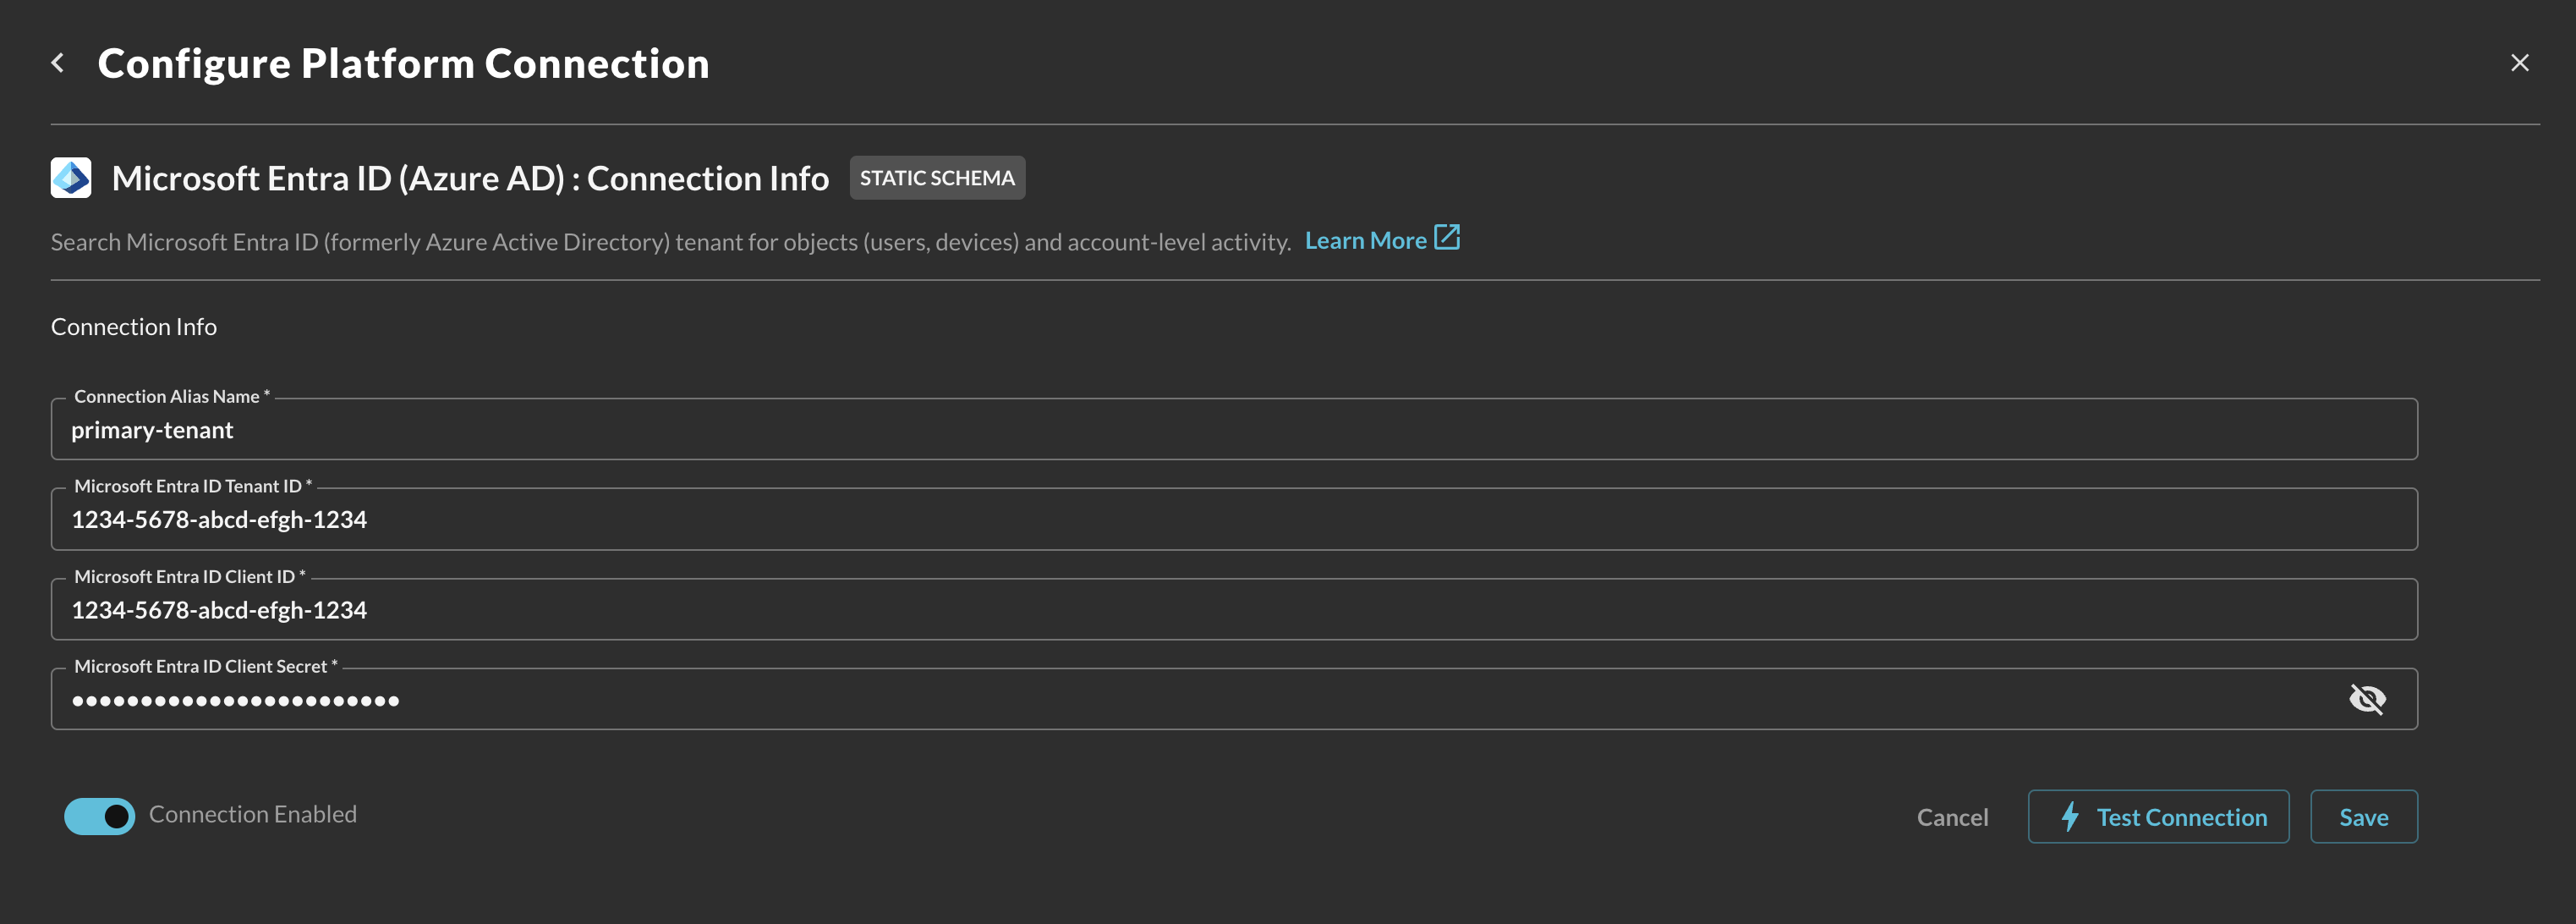
FIG. 11 - Configuring the Connector
-
- Select Test Connection from the bottom-right of the connection pane to ensure that you have an active Intune P1 or P2 license, that you have the right scope(s) added to your App Registration, and that Admin Consent was granted. After that, we attempt to hit each endpoint and filter 1 object to ensure that the end-to-end search federation is operating correctly.
Resources
- Working with Azure Active Directory resources in Graph API
Troubleshooting Steps
- Ensure that you have granted the correct Microsoft Graph permission with admin consent.
- Ensure that the Tenant ID, Client ID, and Client Secret Value match.
- Ensure that you copied the Client Secret Value and NOT the client secret ID.
- Ensure that your client credentials are not expired.
- If you are in a Government or Secret region, please contact Query Support.
Updated 9 months ago