Splunk Enterprise & Cloud
TL;DRTo integrate Splunk Enterprise & Cloud with Query:
- Configure the required API or User Credentials for Splunk
- Add a Splunk connection source in Query with the connection parameters.
- Test the integration with Test connection link.
- Perform searches for alerts, users, devices, and file signatures.
Splunk Enterprise® Vs Splunk Cloud® with Query Federated Search
Utilizing Query's Federated search is an easy way to search a single or multiple Splunk instances with a federated search. Here are some common use cases for federated searches with Splunk:
- On-premises and in Splunk Cloud
- International Deployments with no backend connectivity
- GDPR where the data must remain within a region or country
- Splunk deployments are in many business silos such as Security Ops, DevOps, and Business Operations
There are many deployment options with Splunk such as public cloud, Splunk Cloud, or on premise. Query's Federated Search platform utilizes the Splunk Search API ports to complete searches, typically port TCP/8089. If this API port is unavailable Query Connect (Query's on-premises access solution) must be deployed. See the Query Connect section for more information.
Splunk Cloud or Enterprise Publicly Available
If your Splunk deployment utilizes Splunk Cloud or your Splunk Enterprise is publicly available to the internet, no additional configuration is necessary to connect to Query's Federated Search Platform. Continue below in the Splunk Configuration section of this document.
Splunk Enterprise On-Premises
Query's Federated search platform must be able to connect to the the source data's API directly. However not all Splunk deployments are open to the internet. If your Splunk deployment does not allow internet access to Splunk API port (default TCP/8089), then you will need to deploy Query Connect first then return to this page to continue the setup process.
Splunk Configuration
Limiting Access For Query's Federated Search
Typically a service account is utilized to access Splunk indexes. The Splunks User Roles control what indexes that service account has access to. For example, you have 3 indexes, auth, network, and operations. If you assign a role to the service account that only give access to the auth and network indexes, Query's Federated search platform will not configure or search the operations index. The service account does not have access thus your team maintains all access and confidentiality of the data.
If you would like assistance on configuring multiple indexes, user roles, and different organizations please reachout to Query's Customer Success group.
Splunk Roles
No matter the authentication mechanism you will need to assign a role to the service account. For more information on how to configure a service account, see Splunk Roles documentation.
Option 1: Splunk Username & Password Authentication
There are two methods for authentication into Splunk, Username & Password or via Token auth. The mechanism is up to you and does not change the capability of the integration.
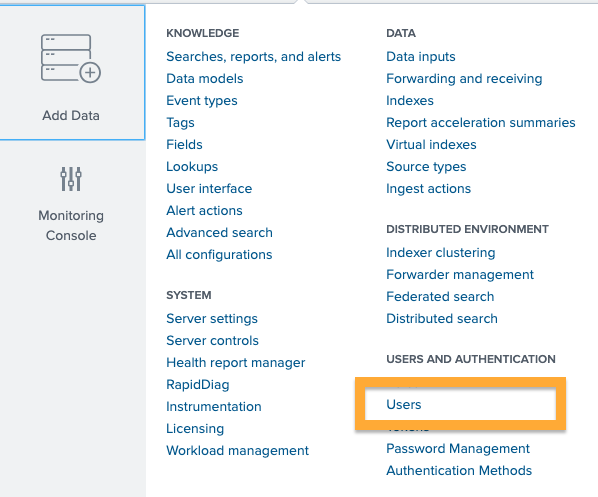
Login to Splunk with an account that has user and role change permissions. Then click Settings in the upper right and then select Users.
Next click New User and complete the New User form. Note the Assign Roles box. Here is where you control what indexes and permissions assigned to the service account.
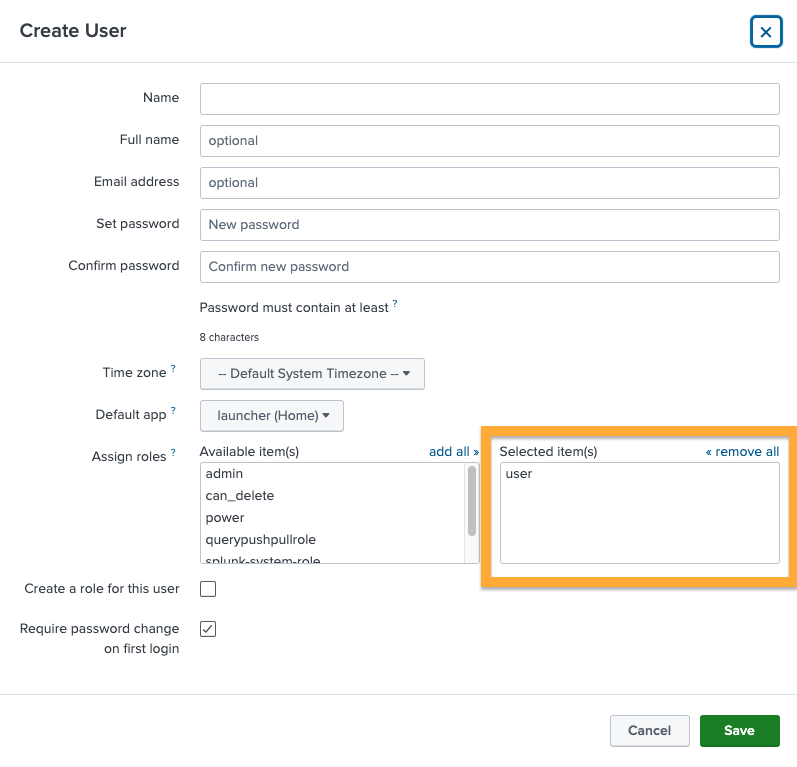
Click Save.
Option 2: Splunk Token Authentication
If your team wishes not to use username and password to authenticate Query's Federated search integration you can use Token based authentication. You will still need a user account and role assigned as documented above.
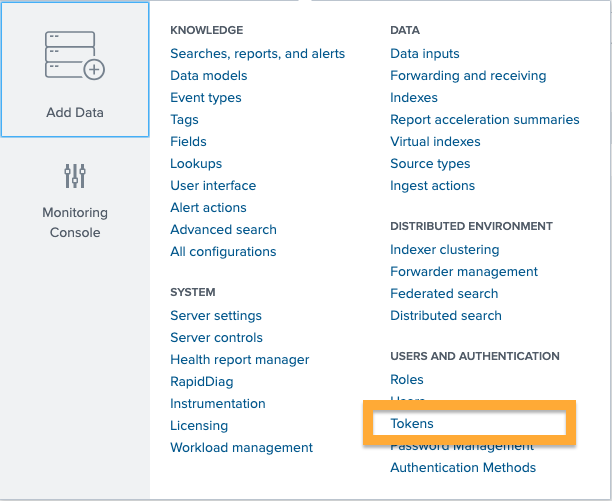
To use Token based authentication, in the Splunk console select Settings then Tokens.
Click New Token and complete the form:

Click Create and ensure you copy/paste the token. We will use this later in the Query configuration.
Configure Query Federated Search
Start by logging into the Query Federated Search console and go to the Connection page to review all existing data connections or integrations. Click +Add Connection .
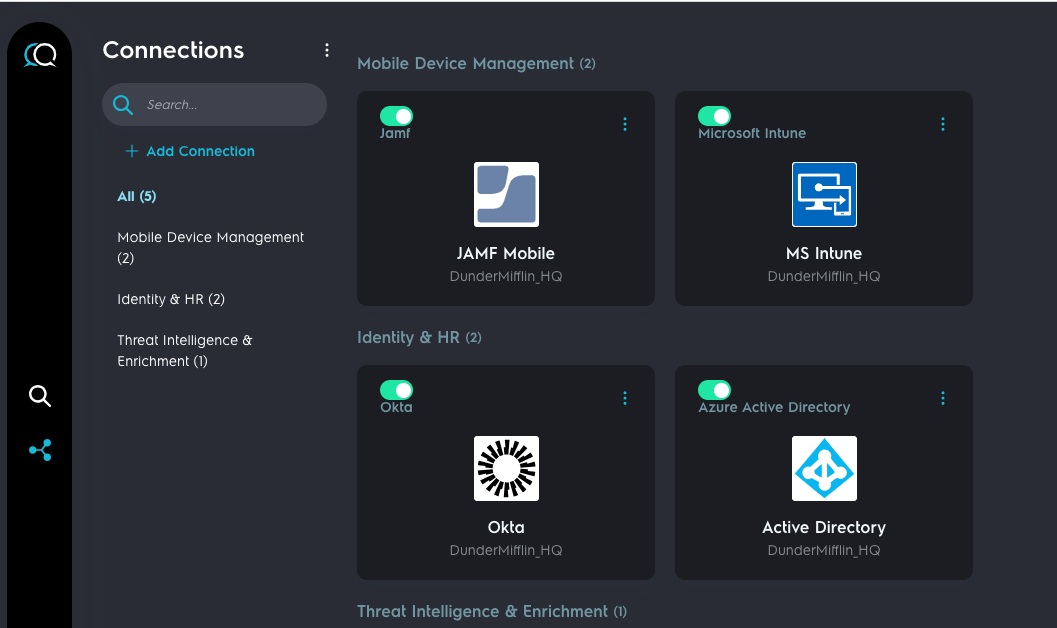
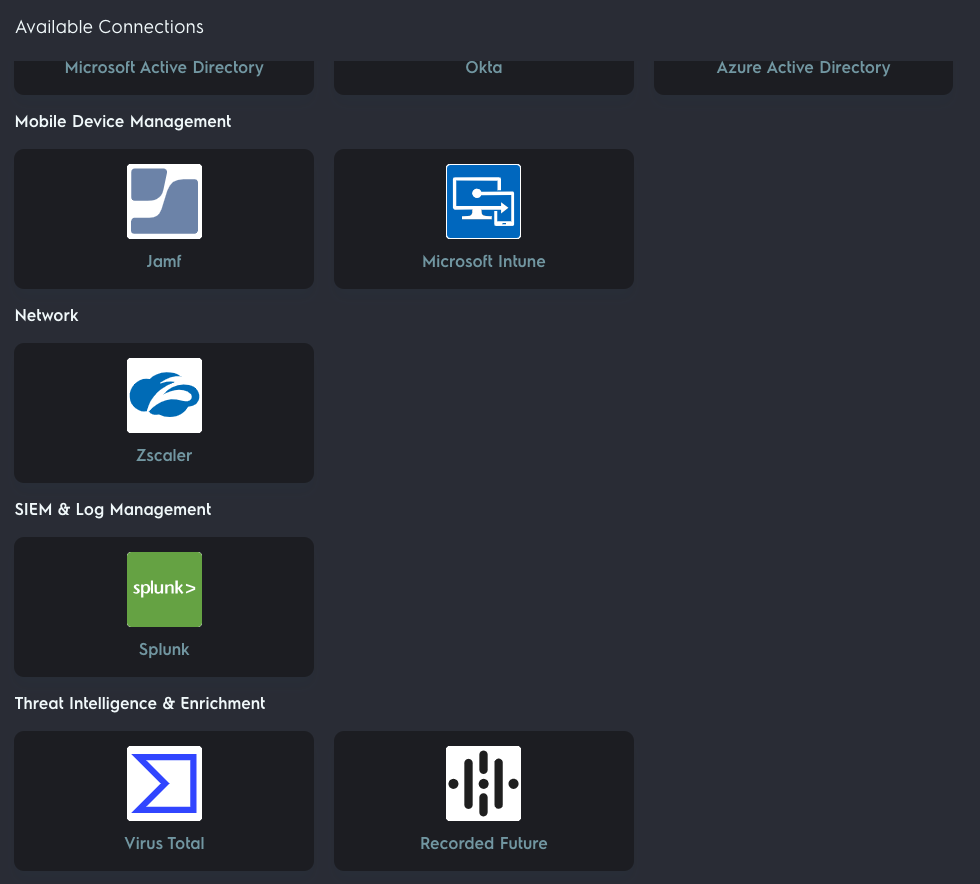
Scroll through the different connection types and select Splunk
Next Complete the form depending on how you have configured Splunk
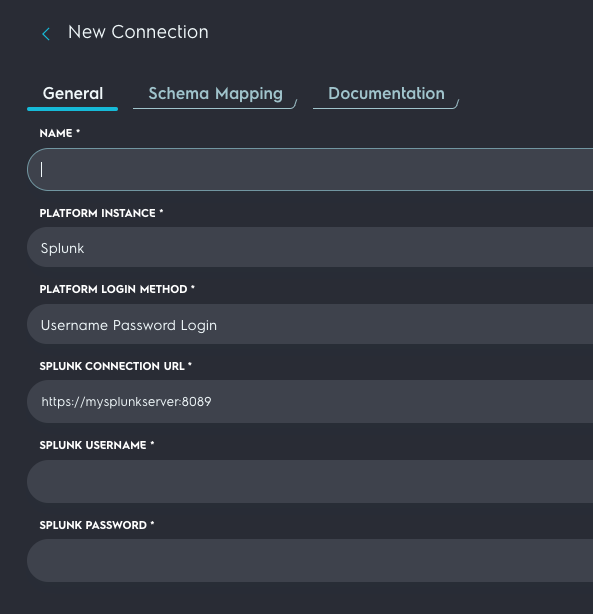
The parameters are as follows:
- Name This is a unique identifier that appears throughout the Query console. If you have more than one Splunk deployment or configuration you may want to identify each with specific terms. For example if you have instances in the EU and USA you might name them
Splunk EUandSplunk USA. - Platform Instance Splunk for this document. This holds true if this is Splunk Cloud or Enterprise
- Platform Login Method Options are
Username Password LoginORToken LoginSelect the correct type of authentication as configured earlier in this document. - Splunk Connection URL This is the URL to the Splunk search head that has a default port TCP/8089 open.
- Option 1: Splunk Username Enter the Splunk username configured above
- Option 1: Splunk Password Enter the Splunk password for the username configured previously
- Option 2: Splunk Token If using
Token Login, paste the token configured from the Splunk UI.
Click Test Connection
Click Save
Schema(s)
The Schema UI is currently under development and will be documented when released.
Updated 9 months ago