Splunk HEC Destination
Write data the right way into Splunk HTTP Event Collectors (HECs), powered by Query Security Data Pipelines.
Overview
Splunk is a powerful platform that helps organizations achieve digital resilience by providing comprehensive visibility and insights across their entire digital footprint. Customers choose Splunk for its ability to:
- Prevent Major Issues: By offering extensive visibility, Splunk helps identify risks and detect incidents, enabling proactive responses and significantly reducing downtime.
- Remediate Threats and Disruptions Faster: It streamlines incident prioritization and standardizes workflows, leading to quicker resolution times for outages and security breaches.
- Adapt Rapidly to New Opportunities: Splunk empowers organizations to quickly adjust to changing market conditions and adopt new technologies with minimal business risk, accelerating time to market for new applications.
Splunk HTTP Event Collectors (HECs) provide a robust and efficient way to ingest data into Splunk, allowing you to leverage these powerful capabilities for unified security, full-stack observability, and custom applications. Splunk HEC events are sent in batches of 500 with GZIP JSON over the wire.
Prerequisites
To effectively use the Splunk HEC Destination, you need to configure your Splunk environment by creating an index, setting up an HTTP Event Collector (HEC) token, and identifying your HEC endpoint. These steps ensure that Query Security Data Pipelines can securely and efficiently write data to your Splunk instance.
1. Create a Splunk Index
An index is where Splunk stores and organizes the data it collects. To create a new index:
- Navigate to Settings > Indexes in your Splunk Web interface.
- Click New Index.
- Provide a Name for your index (e.g.,
query_security_data). - Configure other settings as per your requirements (e.g., Max size of entire index, Home path, Cold path, Frozen path).
- Click Save.
2. Configure a Splunk HEC Token
A HEC token is essential for authenticating data sent to your Splunk instance. To create and configure a HEC token:
- Navigate to Settings > Data Inputs in your Splunk Web interface.
- Under Local Inputs, click HTTP Event Collector.
- Ensure All HTTP Event Collector Inputs is set to Enabled.
- Click New Token.
- Enter a Token Name (e.g.,
query_security_hec_token). - (Optional) For Source type, choose an appropriate source type or leave as automatic.
- (Optional) For Output Group, select an existing output group or create a new one.
- Under Index settings, select the Allowed Indexes where data from this HEC token can be written. Choose the index you created in the previous step.
- Click Review and then Submit.
- After creation, Splunk will display the generated Token Value. Make sure to copy this token value as it will be used for authentication.
3. Identify Your Splunk HEC Endpoint
The HEC endpoint is the URL where Query Security Data Pipelines will send your data. It typically follows this format:
https://<your-splunk-instance>:8088/services/collector
<your-splunk-instance>: This will be the hostname or IP address of your Splunk instance (e.g.,splunk.example.comor192.168.1.100). For Splunk Cloud, this would be your Splunk Cloud URL.:8088: This is the default port for Splunk HEC. If your Splunk administrator has configured a different port, use that instead.
You can usually find your Splunk instance hostname in the URL of your Splunk Web interface.
Configure a Splunk HEC Destination
If you already have an existing Destination, skip to Step 4.
-
Navigate to the Pipelines feature in the Query Console and select + New Pipeline form the top of the page, as shown below.
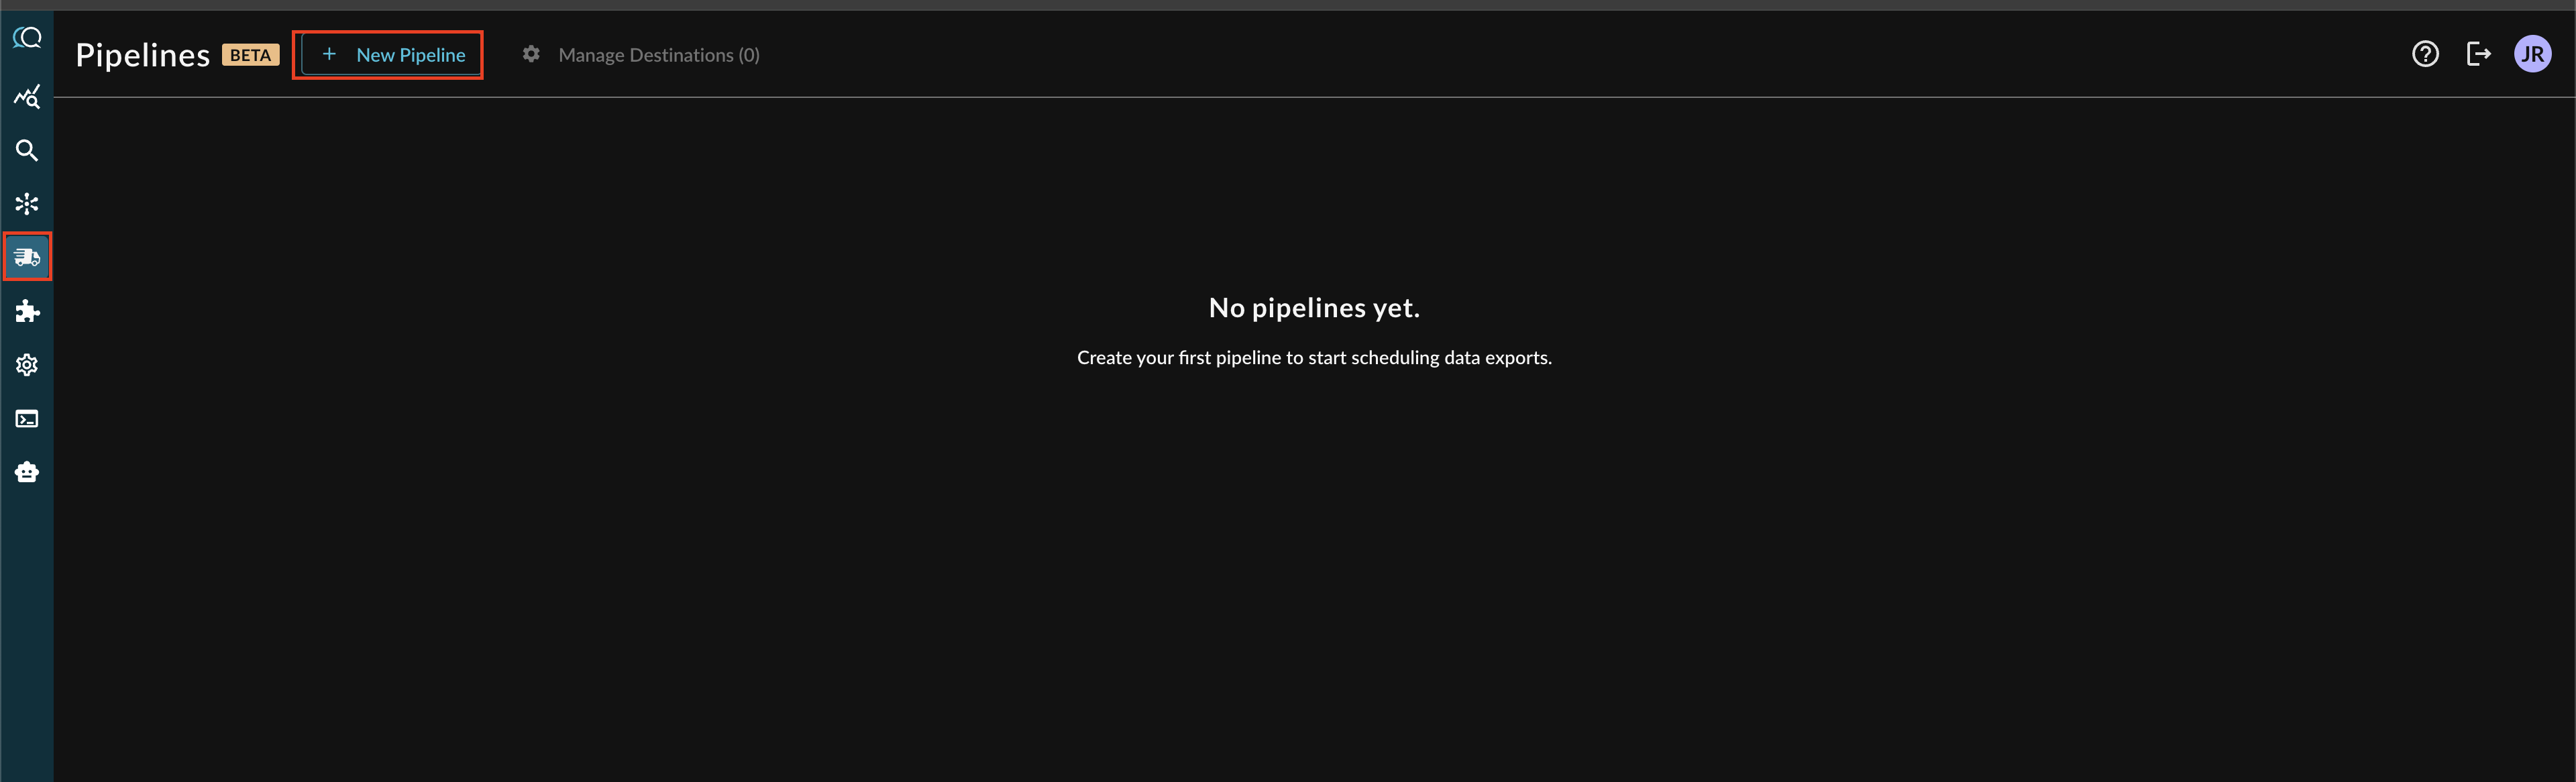
Note: If you already have an existing Destination, this toggle will read Manage Destinations (n) instead, as shown below. You can directly add a new Destination from the Destination Manager.

-
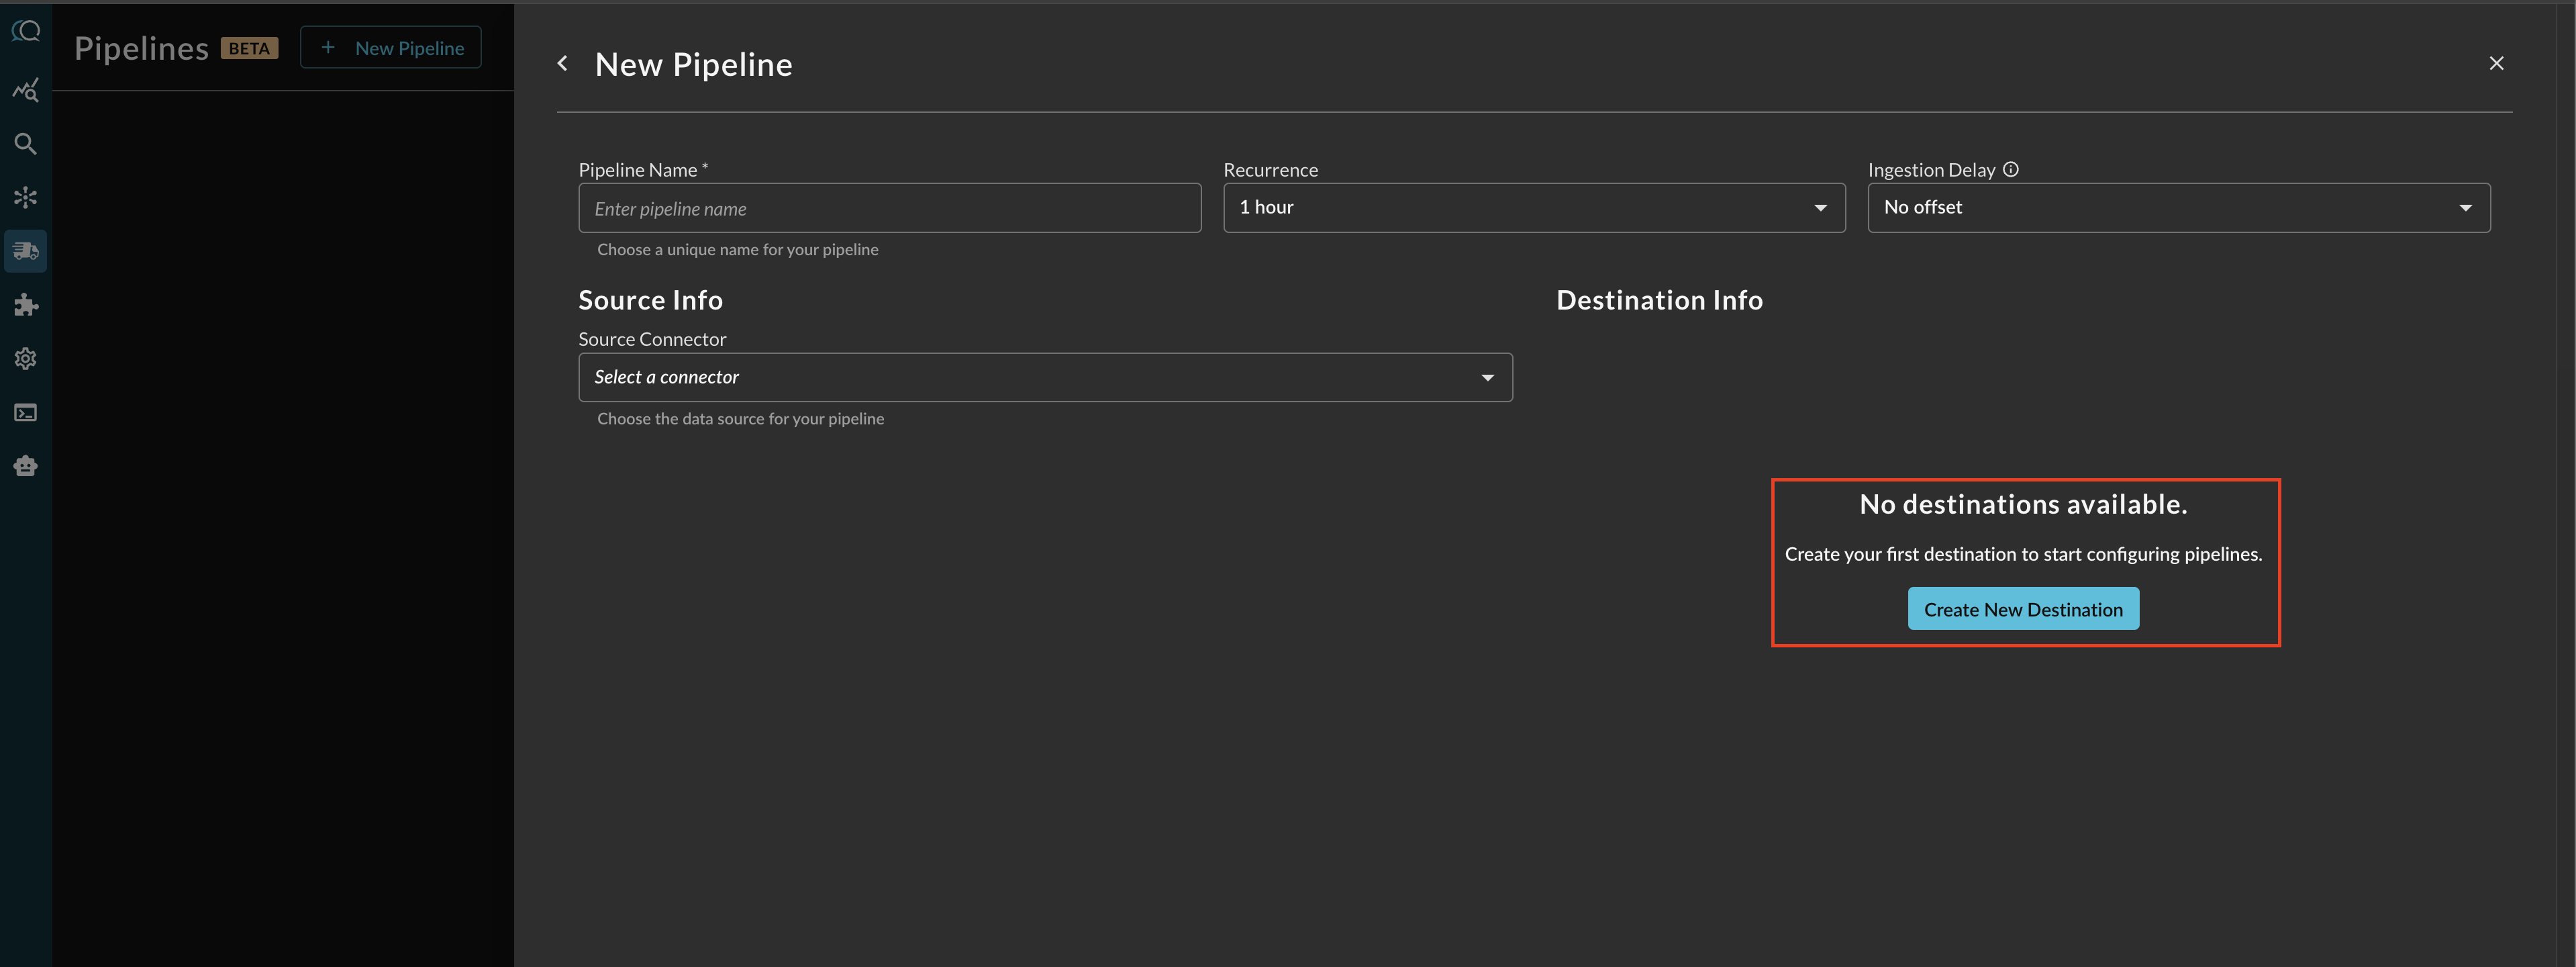
Before configuring your pipeline, if a destination does not exist, select Create New Destination within the Pipeline creation interface as shown below.
-
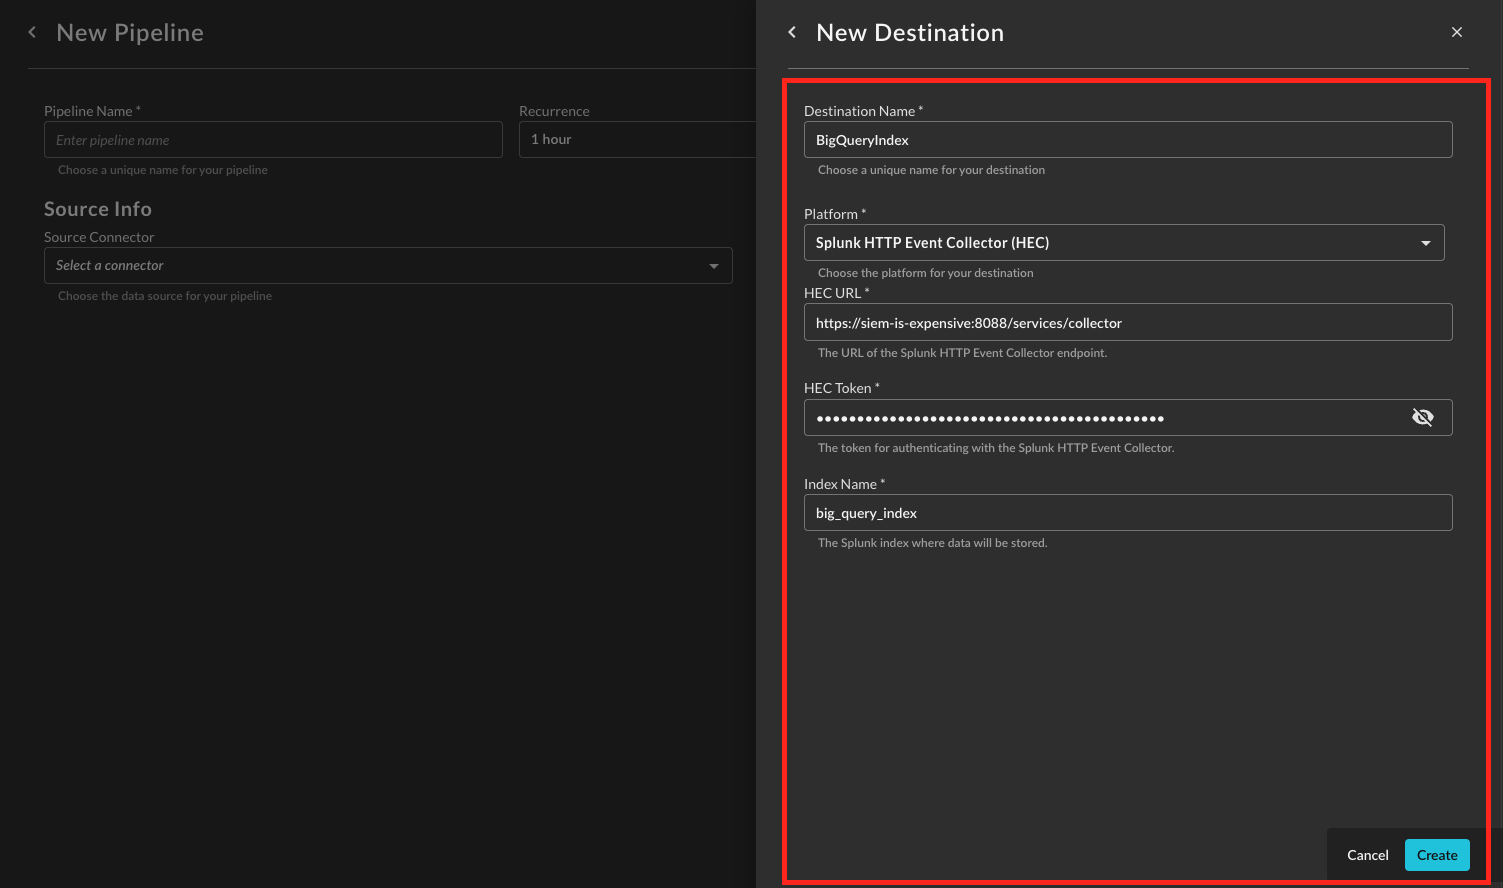
Provide a Destination Name, you can reuse these destinations across multiple pipelines. From Platform select
Splunk HTTP Event Collector (HEC), and provide the following parameters. Once completed, select Create.-
HEC URL : The full URL for your Splunk HEC Endpoint, such as
https://<your-splunk-instance>:8088/services/collector. -
HEC Token: The HEC Token created.
-
Index Name: The Splunk index where the data send to this HEC destination will be routed, must be allowed by the HEC.
-
Operationalizing Splunk HEC Destinations
The Query Security Data Mesh empowers operators to achieve federated search across multiple Splunk indexes and other decentralized data sources. This means you can access and analyze data as if it were centralized, even when it resides in various locations.
To onboard Splunk indexes into the Query Security Data Mesh for federated search:
- Utilize the Query App for Splunk: This application is key to interacting with data from diverse sources, including your Splunk indexes, directly through your familiar Splunk console. It eliminates the need for data ingestion into a local Splunk index for these external sources.
The Query.AI Federated Search for Splunk integration provides a centralized view of your cybersecurity ecosystem. It offers a plug-and-play experience, allowing security teams to enrich their Splunk environment with real-time and historical data residing outside the Splunk platform without complex data migrations.
Updated 10 months ago