Amazon S3 Destination
Write data the right way into Amazon S3 buckets, powered by Query Security Data Pipelines.
Overview
Amazon S3 is one of the most popular cloud object storage services around, since its inception in 2006, it has stored multiple exabytes of data for 10s of millions of users and organizations. Amazon S3 is also a popular storage engine to back security data lakes and security data lakehouses onto in combination with query engines such as Amazon Athena, TrinoDB, Star Rocks, or used as an intermediary storage between Amazon Redshift, ClickHouse, Databricks, and/or Snowflake.
The Amazon S3 Destination for Query Security Data Pipelines writes data the right way pertaining to the aforementioned usage. The data is written in the following ways to aid in schema registration and performant reads:
- All data is written into OCSF-formatted Apache Parquet, partitioned on the
timefield by year, month, day, and hour. The file names are seeded by a 16 digit UUID and the datetime to avoid object overwrites. - Data is compressed with ZStandard (ZSTD) compression that offers the best balance of compression efficiency and decompression speed for querying the data.
- Data is written into Hive-like partitions (e.g.,
source=your_connector_name/event=detection_finding/year=2025/month=08/day=21/hour=17/) which is easily discovered by AWS Glue and other metadata catalogs and query engines.
To support writing the data, Query will assume your AWS IAM Role with an IAM Policy that gives permissions to write and read objects and read bucket metadata. To audit this behavior, the Session Name will contain _QuerySecurityDataPipelines in your AWS CloudTrail Management Event logs. Refer to the next section for information on how to setup an AWS IAM Role and Policy.
Information on thesourcepartitionThe ensure that there will not be any issues with downstream query engines, your Connector Name (the Source) is converted into a lowercase string that only contains underscores.
All special characters except for whitespace, periods (
.), and hyphens (-) are stripped. Whitespace, periods, and hyphens are replaced by underscores (_). Finally, the entire string is lowercased.For example,
My-Data.Source@2024will be converted intomydata_source2024.
Prerequisites
To use the Amazon S3 Destination you must create an IAM Role with External ID.
- Trusts:
arn:aws:iam::822484525064:role/queryai-security-data-pipelines - Permissions:
s3:ListBucket,s3:PutObject,s3:PutObjectAcl, ands3:GetBucketLocation
You'll need the ARN of your IAM Role and whatever your External ID is as well as the name of your bucket and its home AWS Region.
Configure an Amazon S3 Destination
If you already have an existing Destination, skip to Step 4.
-
Navigate to the Pipelines feature in the Query Console and select + New Pipeline form the top of the page, as shown below.
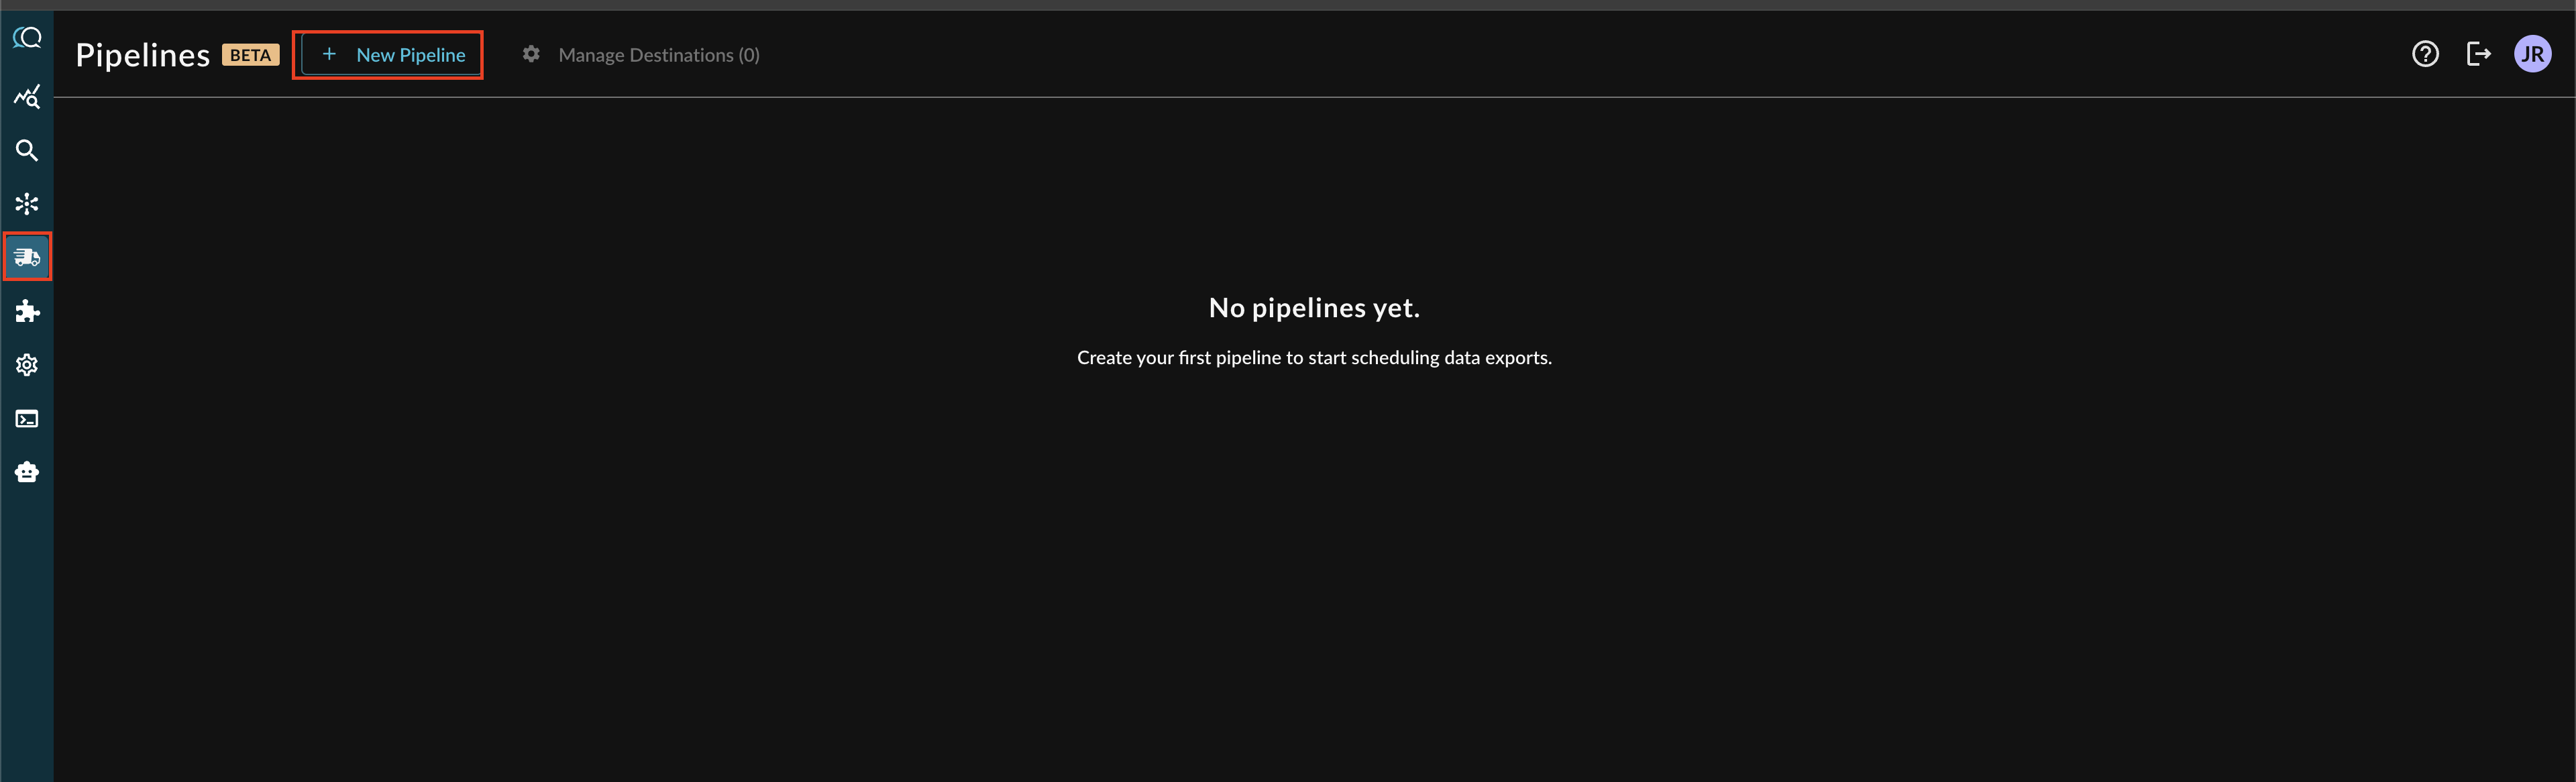
Note: If you already have an existing Destination, this toggle will read Manage Destinations (n) instead, as shown below. You can directly add a new Destination from the Destination Manager.

-
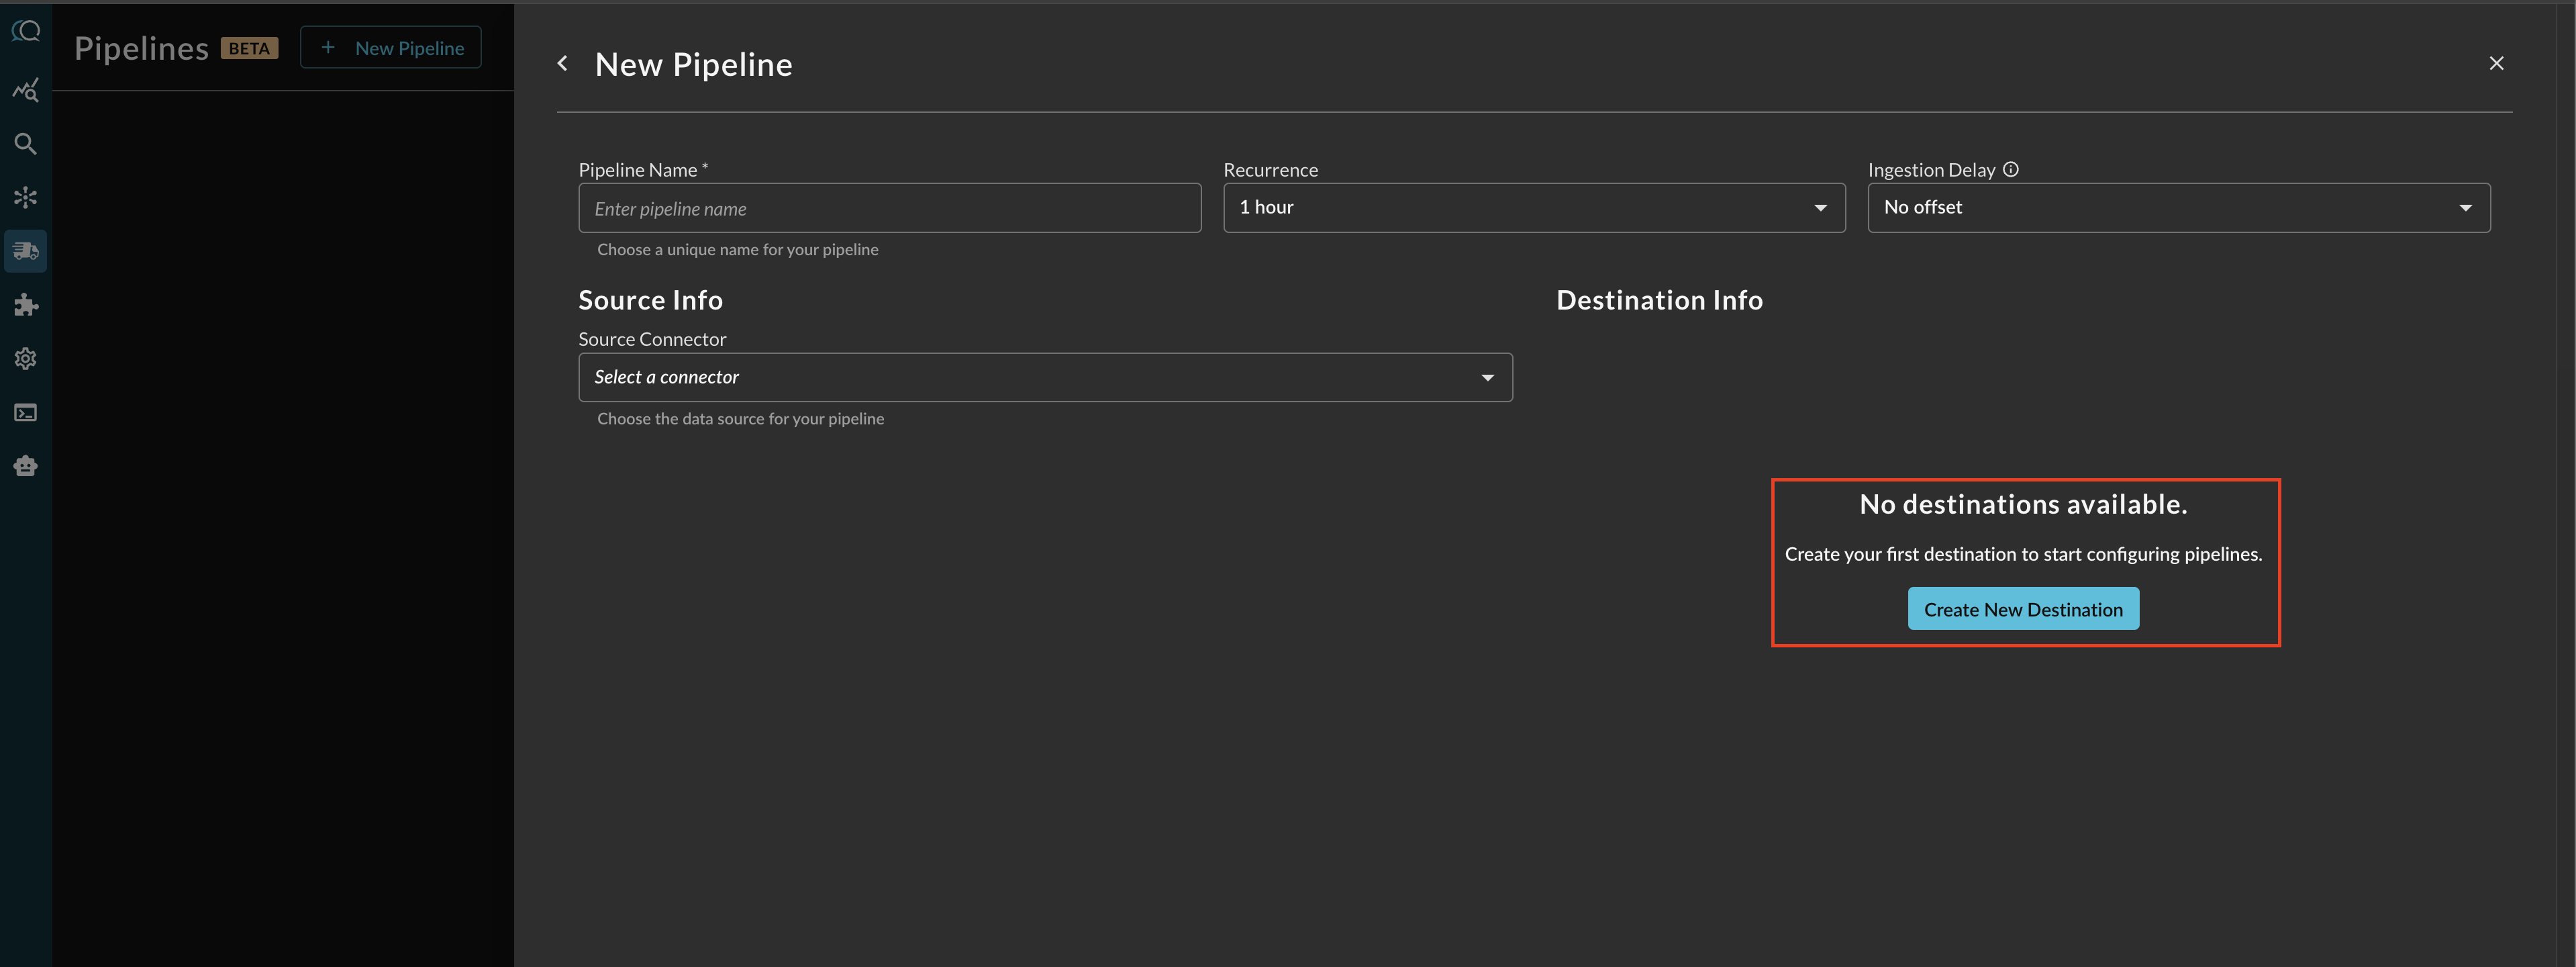
Before configuring your pipeline, if a destination does not exist, select Create New Destination within the Pipeline creation interface as shown below.
-
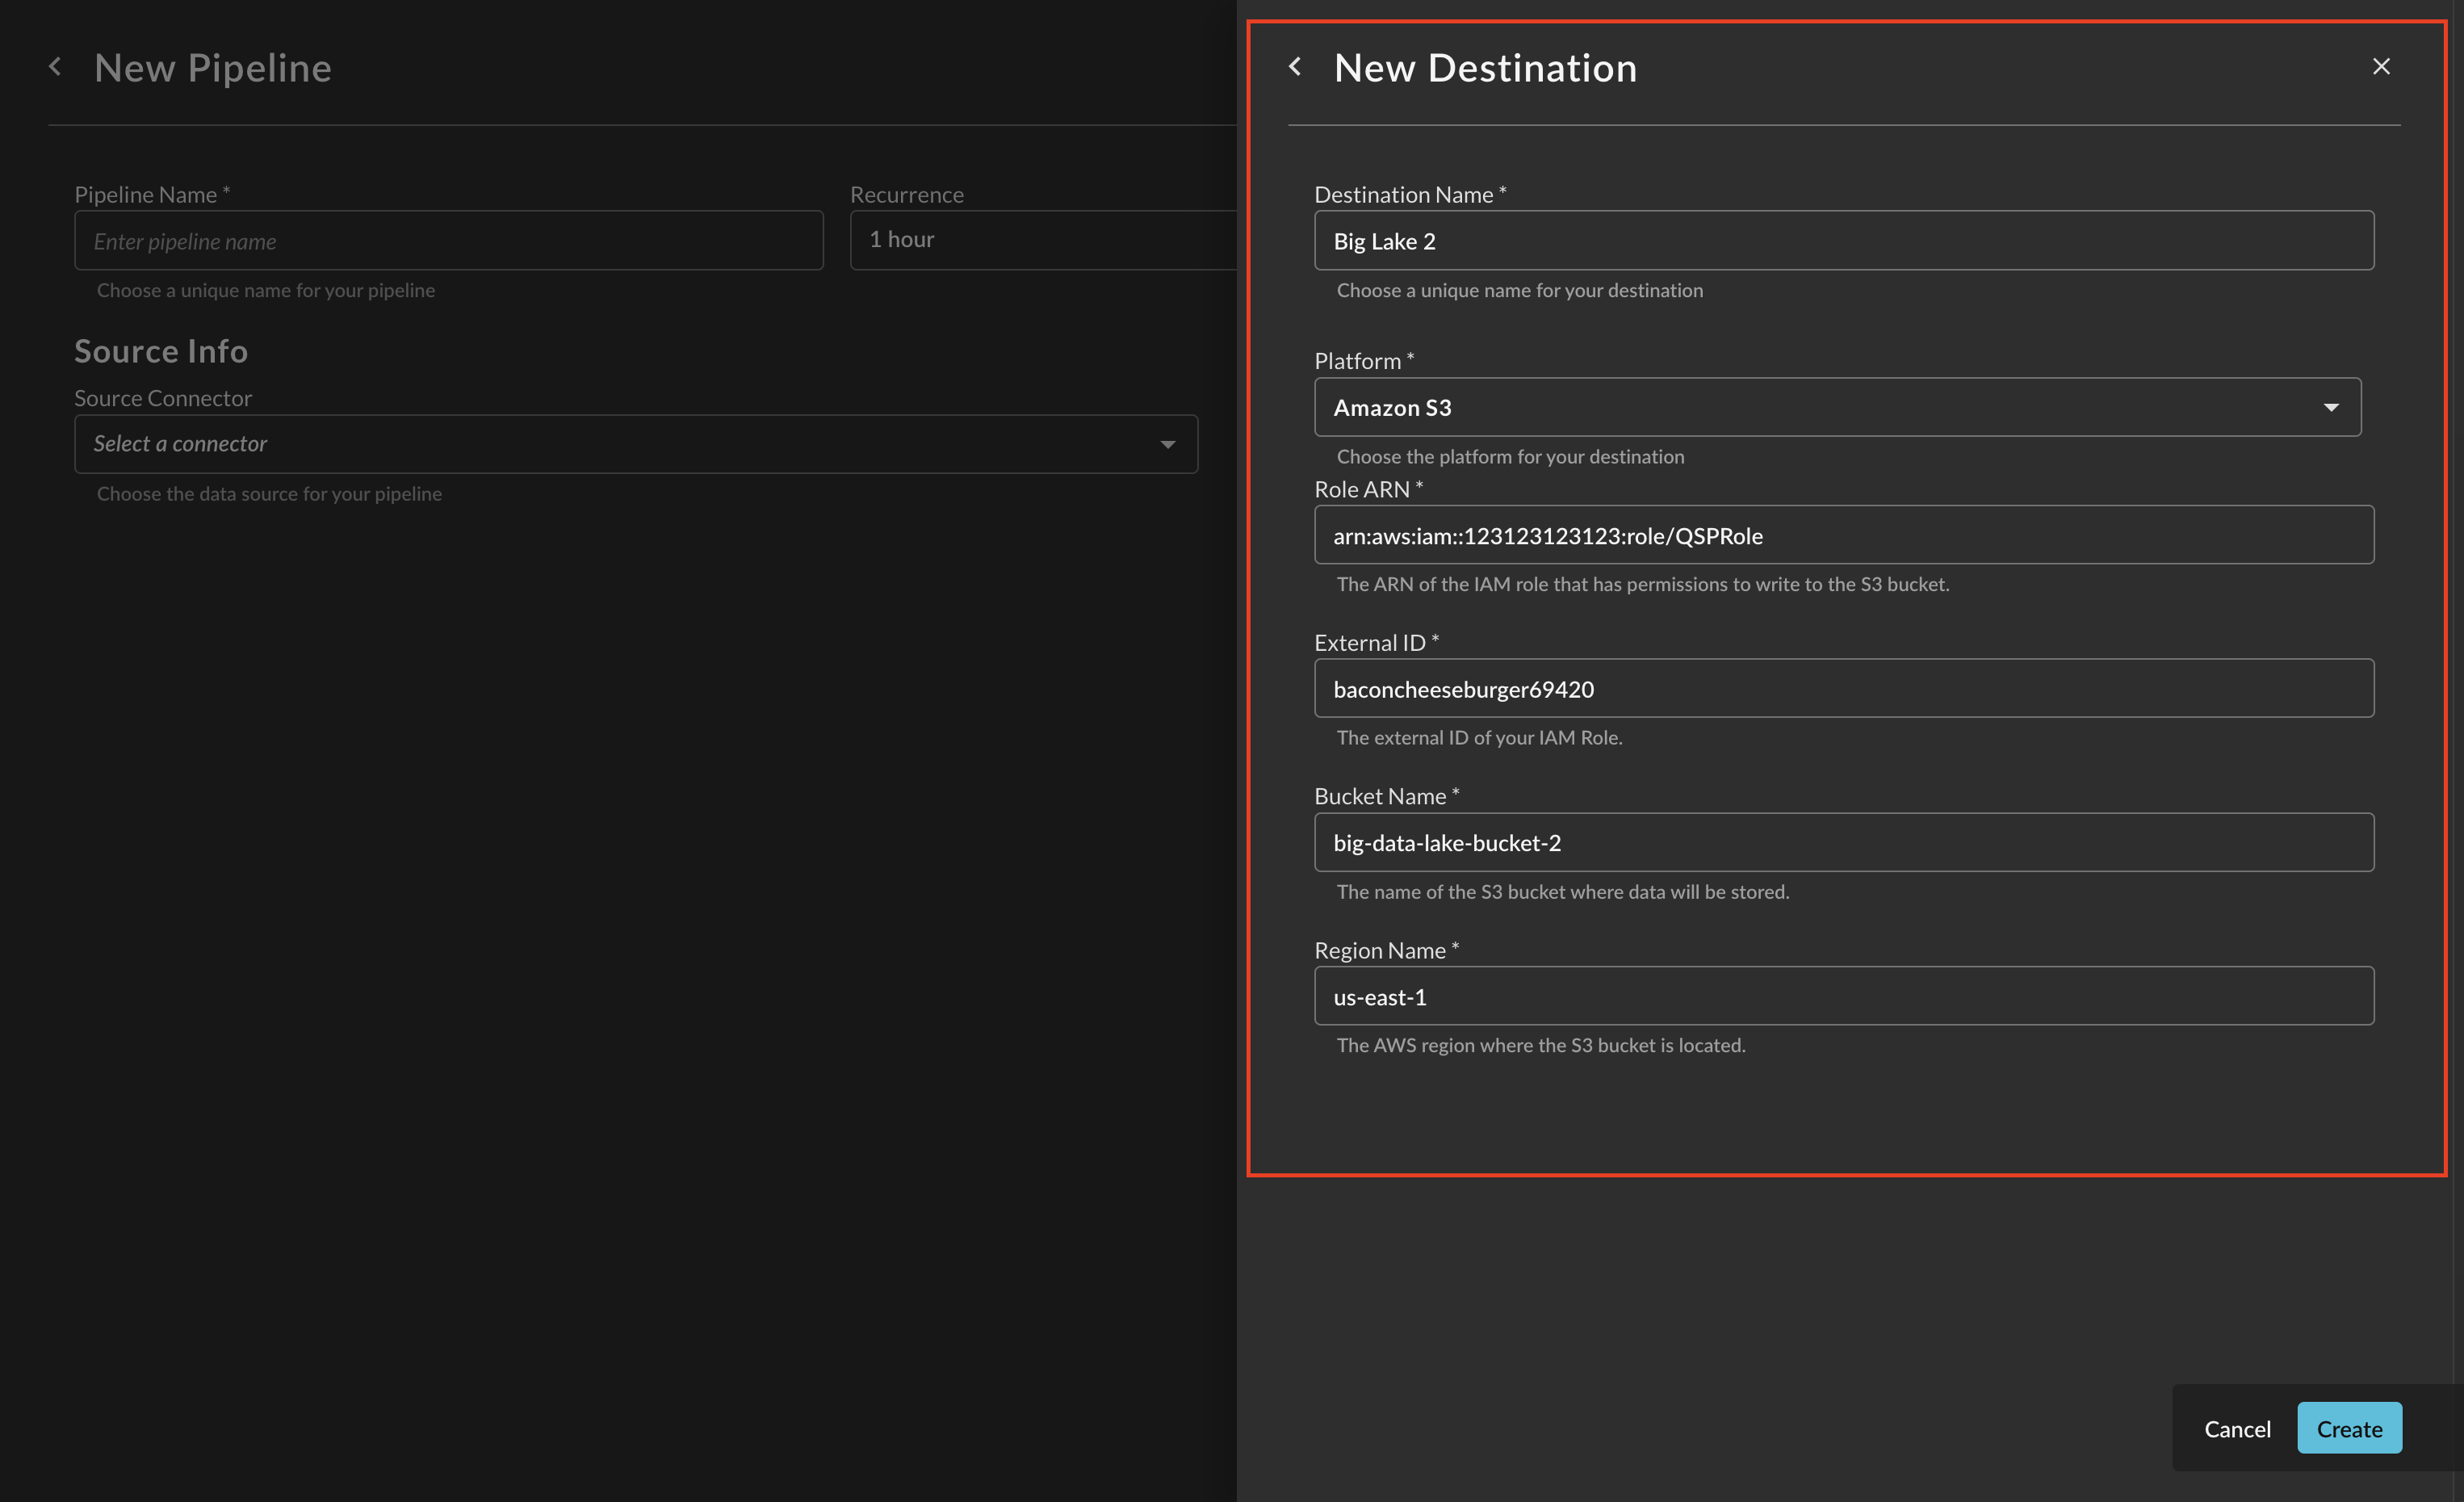
Provide a Destination Name, you can reuse these destinations across multiple pipelines. From Platform select
Amazon S3, and provide the following parameters. Once completed, select Create.-
Role ARN : Your IAM Role ARN created in the prerequisites, paste in the entire ARN and not just the Role Name.
-
External ID: External IDs are used to prevent the "confused deputy" problem in AWS STS, and serves as a pre-shared key, this is helpful when you'll use one IAM Role for multiple Destinations. There is not a minimum length or complexity requirement.
-
Bucket Name: The name of your AWS S3 bucket, do not include
s3://, any paths, or your ARN. -
Region Name: The AWS region name that the Bucket exists under, this is used for creating STS Sessions.
-
-
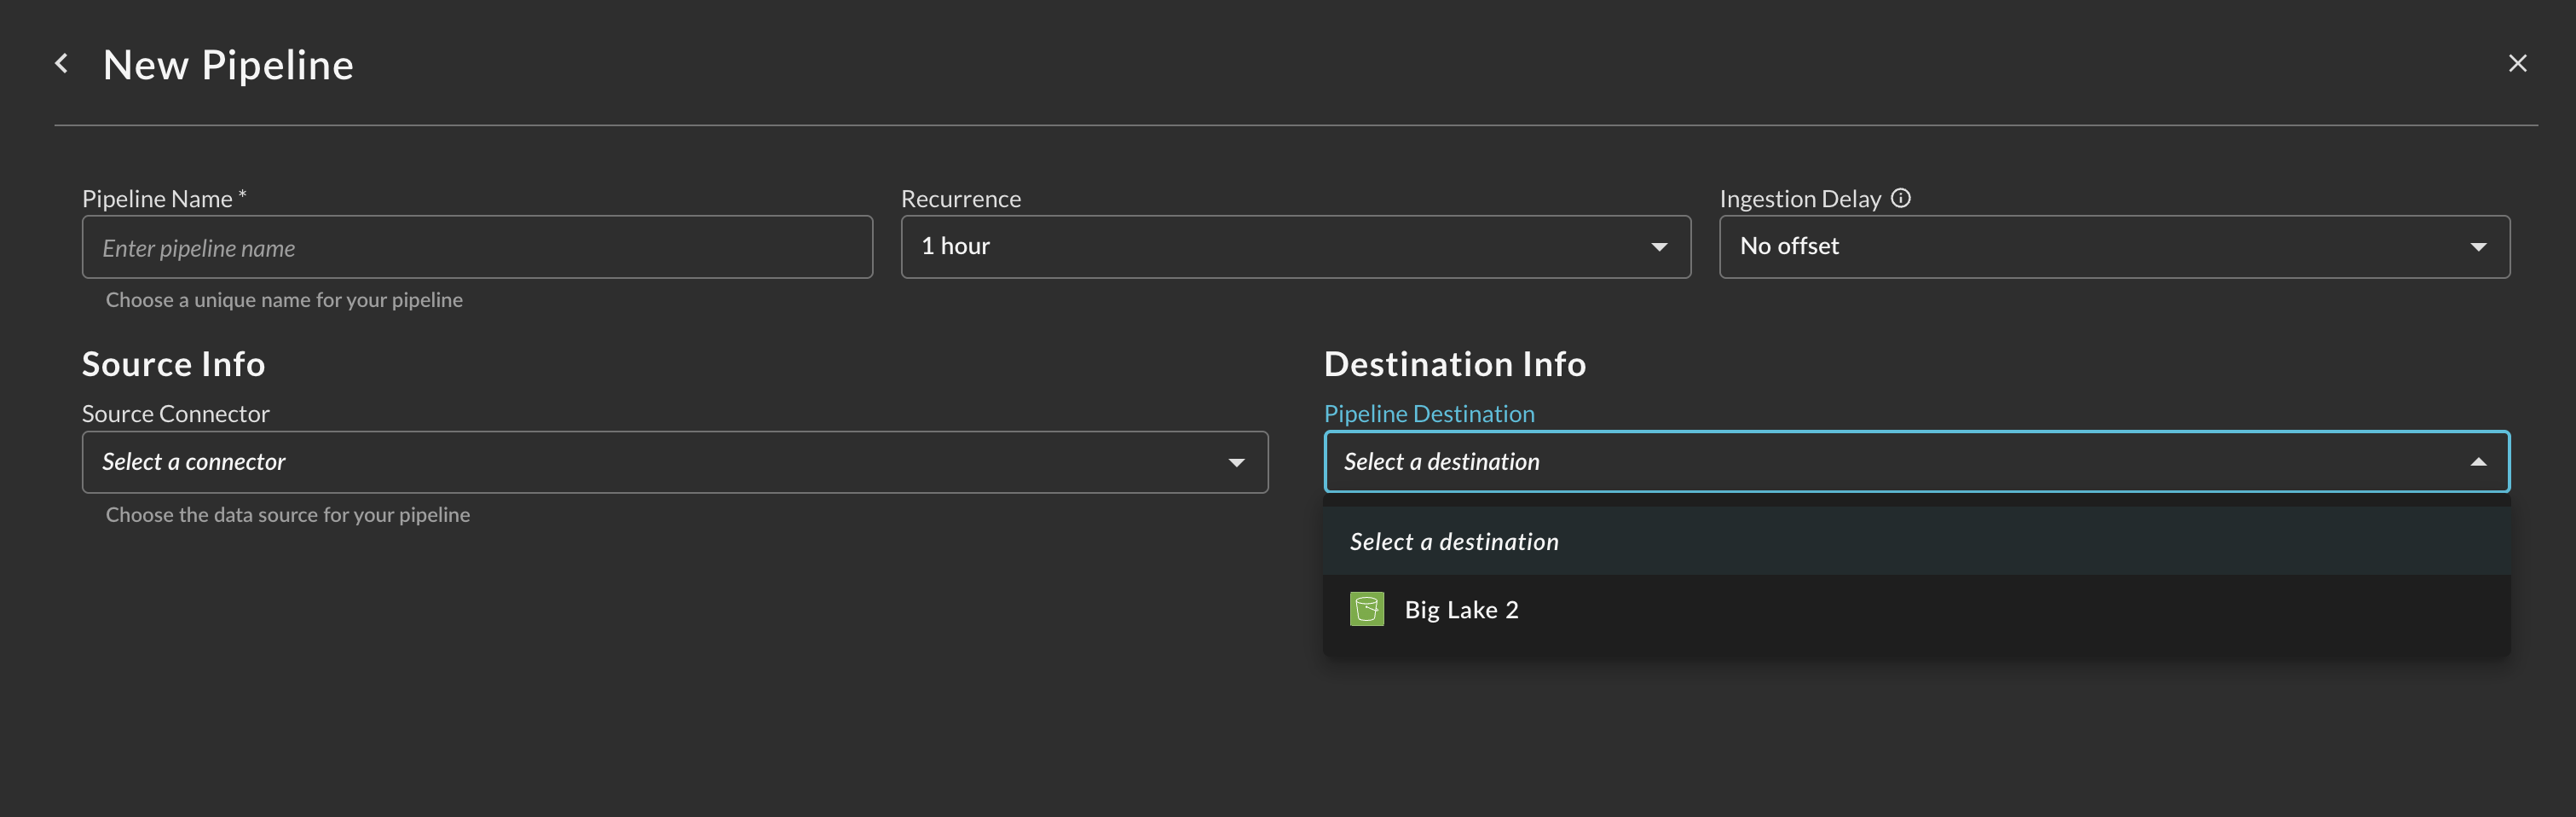
After creating the Destination, you will now have a dropdown menu to select the new Destination for your Pipeline.
Operationalizing Amazon S3 Destinations
The following are tips to operationalize a Security Data Lake(house) on Amazon S3.
- Hive-like partitions and Parquet is easily crawled by AWS Glue Crawlers to automatically register the schema in AWS Glue Data Catalog so you can query it with engines such as Amazon Athena, Star Rocks, TrinoDB, and otherwise.
- Unless you want a single Crawler creating multiple tables, for the S3 Data Source provide the path down to the
eventpersourcesuch as:s3://my-data-lake-bucket/source=your_connector_name/event=detection_finding/.
- Unless you want a single Crawler creating multiple tables, for the S3 Data Source provide the path down to the
- Certain types of data will provide duplicates, such as Discovery Event Categories which include Event Classes such as Device Inventory Info which is intended to represent CMDB-like records of devices or generic assets. All Event Classes typically have a unique event identifier stored in
metadata.uid, you can use Views or CTAS to materialize a new table that will deduplicate onmetadata.uidby the most recent Timestamp (time).- Deduplicate via View
CREATE OR REPLACE VIEW your_db.v_latest_by_uid AS SELECT * FROM ( SELECT s.*, ROW_NUMBER() OVER ( PARTITION BY s.metadata.uid ORDER BY s.time DESC, "$path" DESC -- tie-breaker on file path (optional) ) AS rn FROM your_db.source_table AS s WHERE s.time IS NOT NULL ) t WHERE t.rn = 1;- Deduplicate via CTAS
CREATE TABLE your_db.latest_by_uid WITH ( format = 'PARQUET', parquet_compression = 'ZSTD', external_location = 's3://your-bucket/athena/latest_by_uid/', partitioned_by = ARRAY['year', 'month', 'day', 'hour'] ) AS SELECT s.*, year(s.time) AS year, month(s.time) AS month, day(s.time) AS day, hour(s.time) AS hour FROM ( SELECT s.*, ROW_NUMBER() OVER ( PARTITION BY s.metadata.uid ORDER BY s.time DESC, "$path" DESC ) AS rn FROM your_db.source_table AS s WHERE s.time IS NOT NULL ) s WHERE s.rn = 1; - If you care about ACID compliance and other capabilities such as schema evolution (to add in-line enrichment or other custom data), partition evolution, and managing the data layer in an easier way consider adopting an Open Table Format such as Apache Iceberg. Athena natively supports Iceberg, but you can also use another engine such as Snowflake with
COPY INTOand S3 Stages to hydrate native Iceberg tables. To do so on Athena, consider the following.
-- create the table
CREATE TABLE your_db.iceberg_mde_device_info (
  -- list your columns explicitly, e.g.:
  metadata ROW(uid VARCHAR, ...),
  time TIMESTAMP(3),
  ...
)
LOCATION 's3://your-bucket/iceberg/latest_by_uid/'
TBLPROPERTIES (
  'table_type'='ICEBERG',
  'format'='PARQUET'
);

-- incremental merge from existing table
MERGE INTO your_db.iceberg_mde_device_info t
USING (
  SELECT *
  FROM (
    SELECT
      s.*,
      ROW_NUMBER() OVER (
        PARTITION BY s.metadata.uid
        ORDER BY s.time DESC, "$path" DESC
      ) AS rn
    FROM your_db.source_table s
    WHERE s.time IS NOT NULL
    -- Optional: AND s.time >= current_timestamp - INTERVAL '7' DAY
  ) x
  WHERE x.rn = 1
) src
ON t.metadata.uid = src.metadata.uid
WHEN MATCHED AND src.time >= t.time THEN
  UPDATE SET
    -- list all columns explicitly, e.g.:
    metadata = src.metadata,
    time     = src.time,
    ...      = src....
WHEN NOT MATCHED THEN
  INSERT (
    metadata, time, ...
  ) VALUES (
    src.metadata, src.time, ...
  );
-- Compact all (or filter to partitions with WHERE)
OPTIMIZE your_db.iceberg_mde_device_info
  REWRITE DATA USING BIN_PACK;
-- Or scope it (faster):
OPTIMIZE your_db.iceberg_mde_device_info
  REWRITE DATA USING BIN_PACK
  WHERE year = 2025 AND month = 9;
-- keep only recent snapshots (example: 3 days)
ALTER TABLE your_db.iceberg_mde_device_info
  SET TBLPROPERTIES('vacuum_max_snapshot_age_seconds'='259200');
VACUUM your_db.your_iceberg_table;
- Query supports both regular tables as well as Open Table Formats with Amazon Athena. Consider using our Connector to search over the new data, this is useful where you have a downstream source that does not retain certain types of logs for a longer period of time (e.g., Entra ID, CrowdStrike Falcon, Carbon Black Cloud, etc.).
Updated about 1 month ago